Probably each of us has ever tried to create a manicure using scotch tape. This technique is not as difficult as drawing and sculpting, however, in terms of beauty and variety of nail designs, it is in no way inferior to them. Let's figure out which tape to choose, how to use it, what can be depicted.
Content:
Features and Benefits
It is important to note that regular office tape will not work for us. It leaves a sticky mark, and may even peel off a piece of enamel.
If you don't have anything suitable at hand, stick it several times to the back of your hand. This will remove excess stickiness.
In general, when decorating the nail plate in this way, the masters use a special adhesive tape.
The main advantage of this approach is the availability of materials and ease of implementation. Using this device, you can paint the plate with several colors, creating a clear border between them. When working, the shades will not spread and mix if separated by thin sticky strips. It is very problematic to achieve this effect manually.
Trends 2021 offer the following nail art options that can be created using scotch tape:
- French;
- mosaic;
- geometric ornaments;
- stars;
- chess field;
- colorful stripes in different directions.
There are two types of tape: colored and transparent. The first is used as an auxiliary material, after applying and drying the varnishes, it is completely removed from the plate. The second acts as an independent decor.

What is needed
At the preparatory stage, collect the required tools:
- Low-tack adhesive tape. Narrow or wide, colored or transparent - there is a purpose for each type.
- Base for lacquer, fixing coating.
- Enamels for the background, combined with each other.
- Manicure scissors.
- The decor is optional - sparkles, stones, kamifubiki.
Scotch tape is the main tool in such nail art. When choosing it, pay attention to the following points:
- Adhesiveness - it should not be too high so as not to smudge the varnishes and damage the base.
- Size - wide ribbons will have to be cut for convenience, but for certain ornaments this is exactly what is needed.
- One-sided - two-sided sticks to fingers, creates discomfort when working.
- Traces are bad if stripes remain after peeling off, you cannot do neat work with such tape.
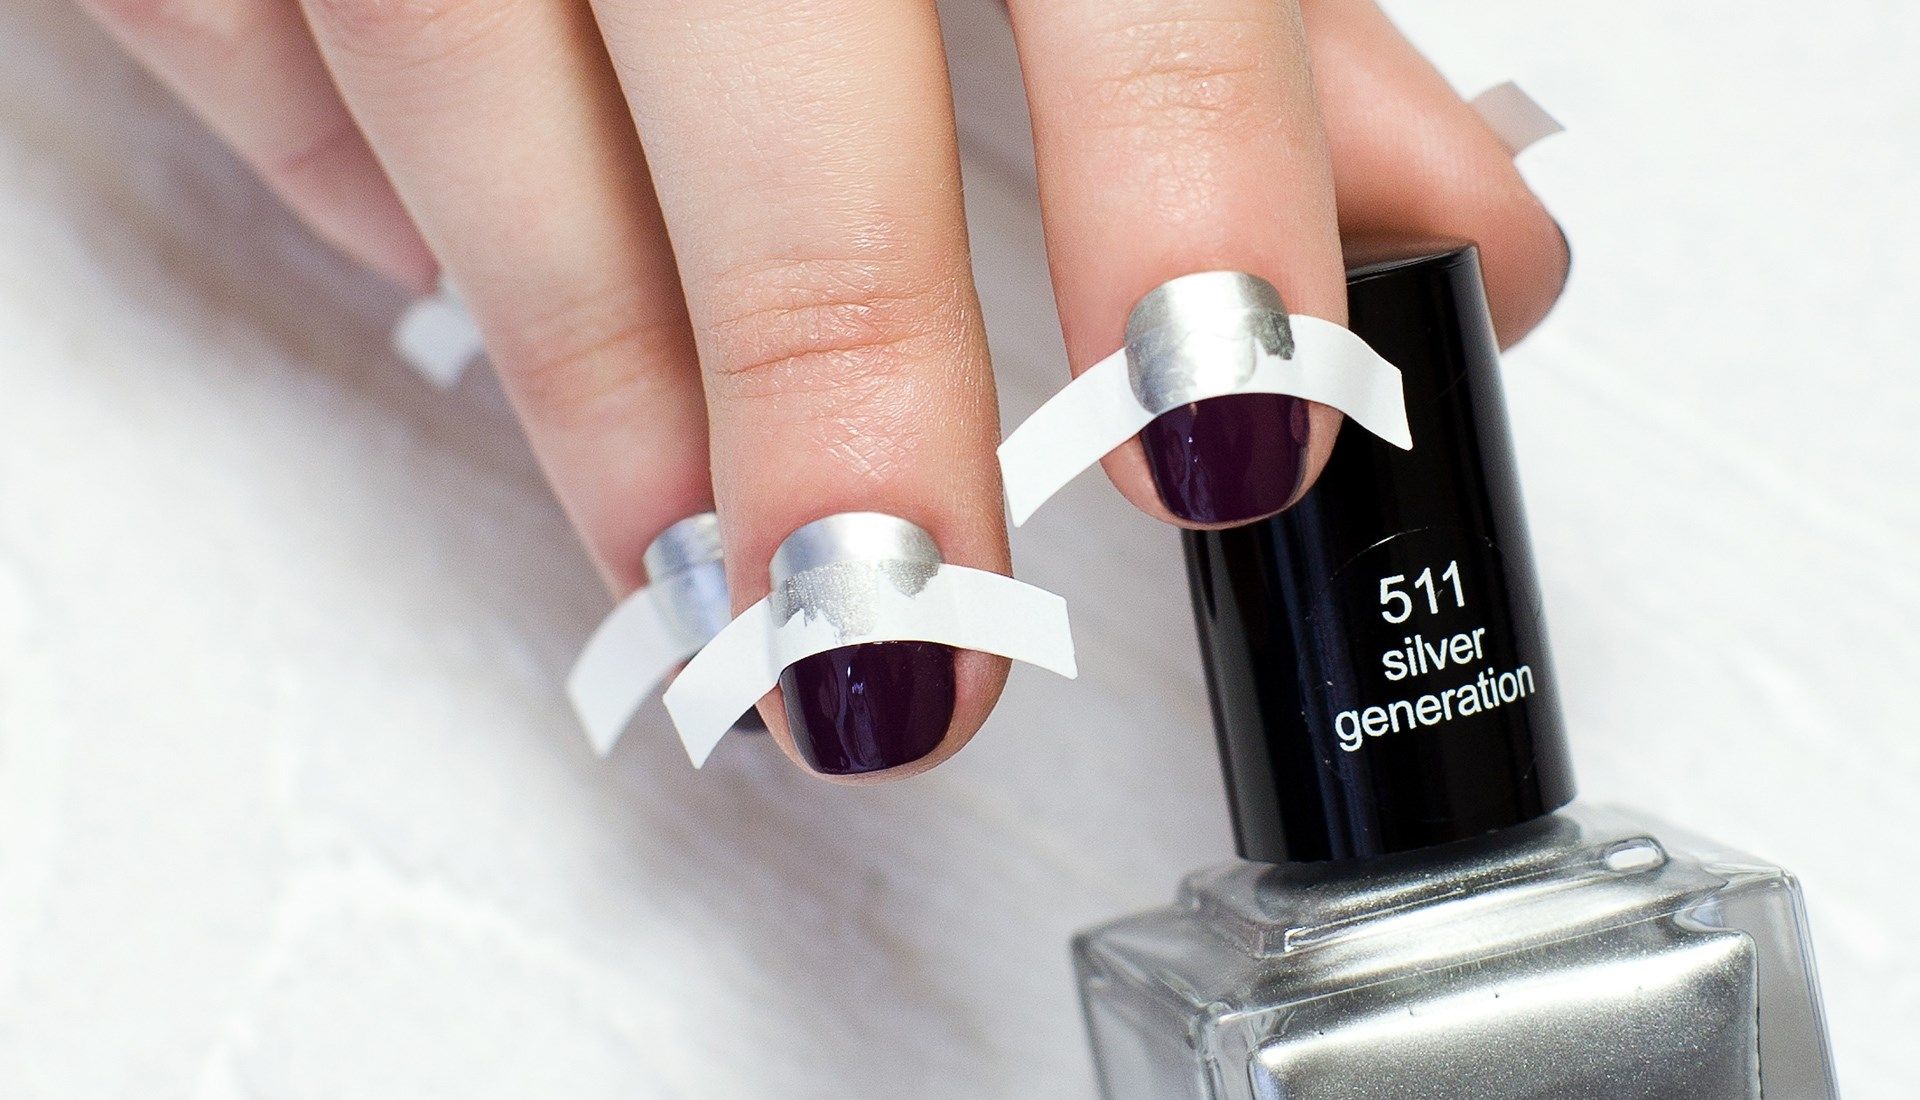
Firmly attach the tape to the surface of the marigold, otherwise the varnish may spread.
Execution technique
Performing a manicure is no different from traditional approaches. First you need to remove the old coating, file and polish your nails, soften and remove the cuticle.
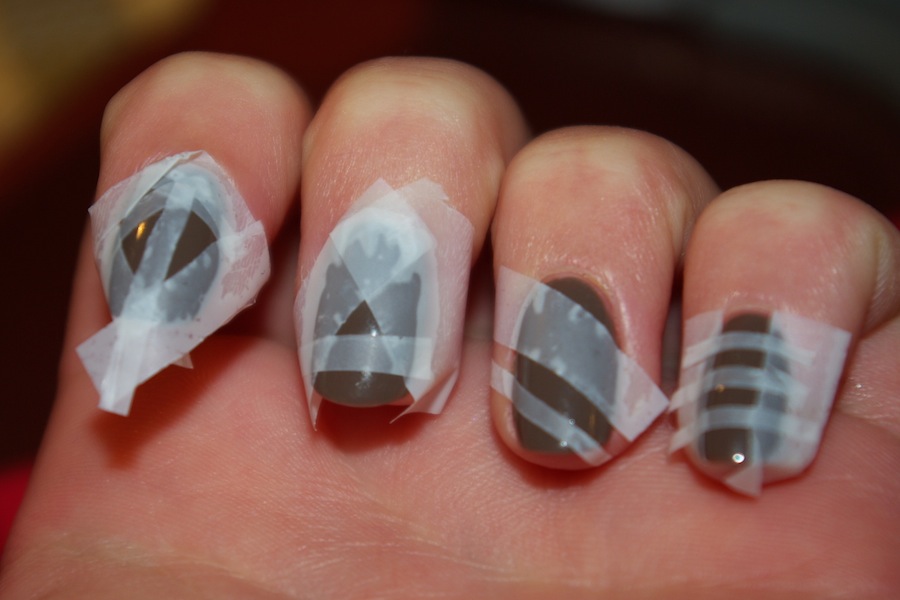
Features start at the plate design stage:
- Apply a base coat.
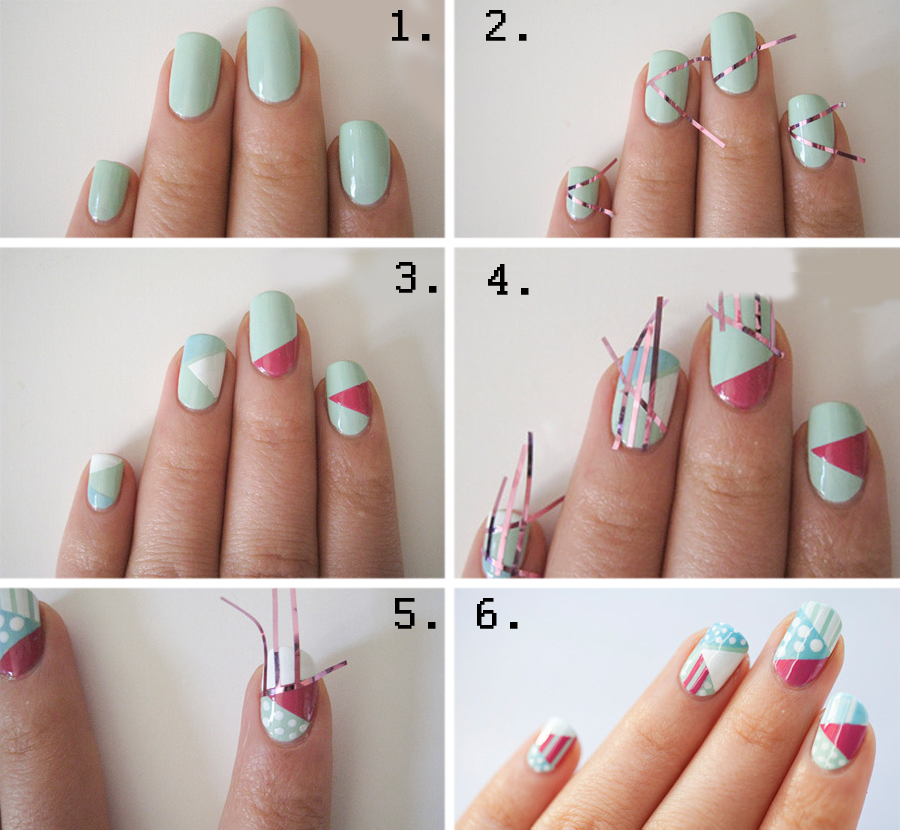
- For the chosen design, on the index and ring fingers, glue the tape just above the midline of the marigold. Tape the tape carefully around the edges to prevent the enamel from spreading during application. Do not cut the tape too close to your finger; leave a piece for easy pulling.
- Apply the colored varnish end-to-end to the cuticle, without protruding beyond the edges of the sticker. It's not scary if the color gets on the tape. It just serves to keep the area under it intact.
- Peel off the tape with a quick, precise motion until the varnish is dry.
- Paint the remaining empty space with a different color.
- After the enamels are completely dry, carefully stick the adhesive tape at the junction of the two paints.
- Cover the result with two coats of fixer varnish.
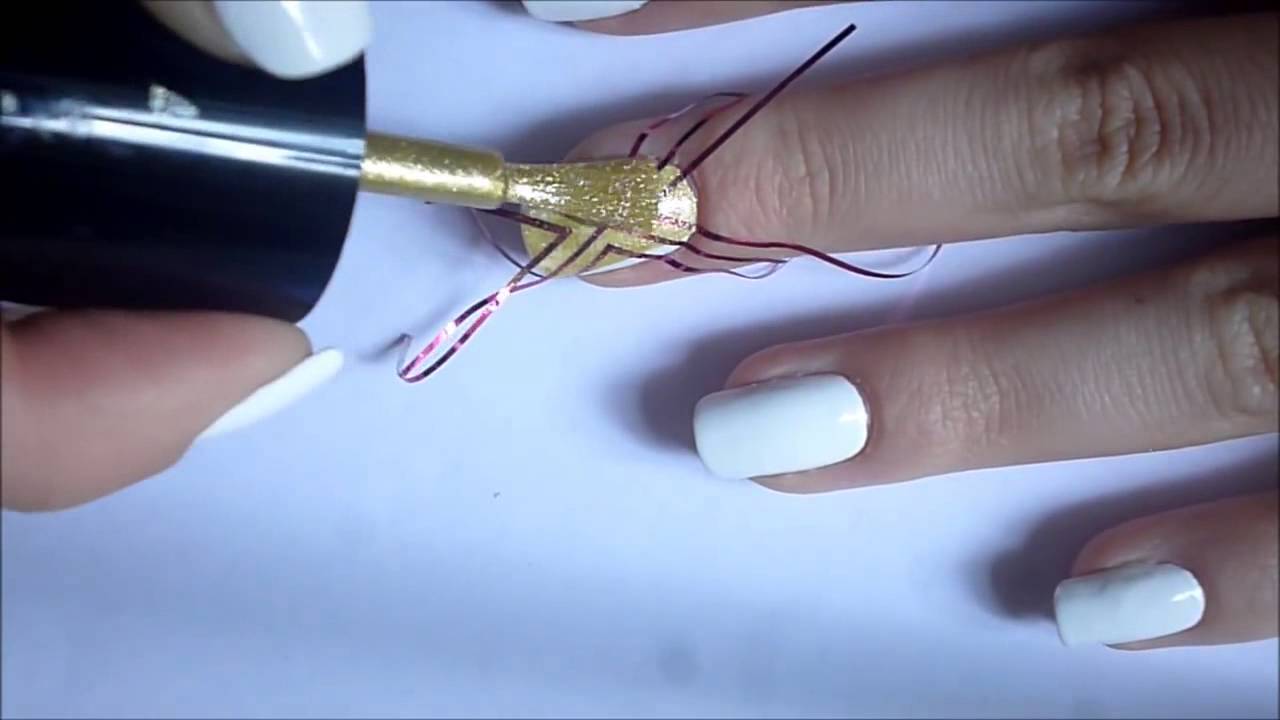
The detailed process is shown in the video. Such work looks stylish and elegant. Brilliant ribbons add zest to the creation, without them nail art would be too boring.
The tapes can be attached in any order and direction. We have presented the simplest option, having mastered which you can create complex geometric patterns, embodying any fantasies into reality.
A few photo instructions:
Manicure ideas
Masters of the nail industry know many ways to design nails. It is better for beginners to follow proven approaches, and professionals who have been decorating their nails with interesting patterns for a long time can come up with a catchy option themselves.
Now we will consider popular ideas, the implementation of which does not require a lot of effort and time.
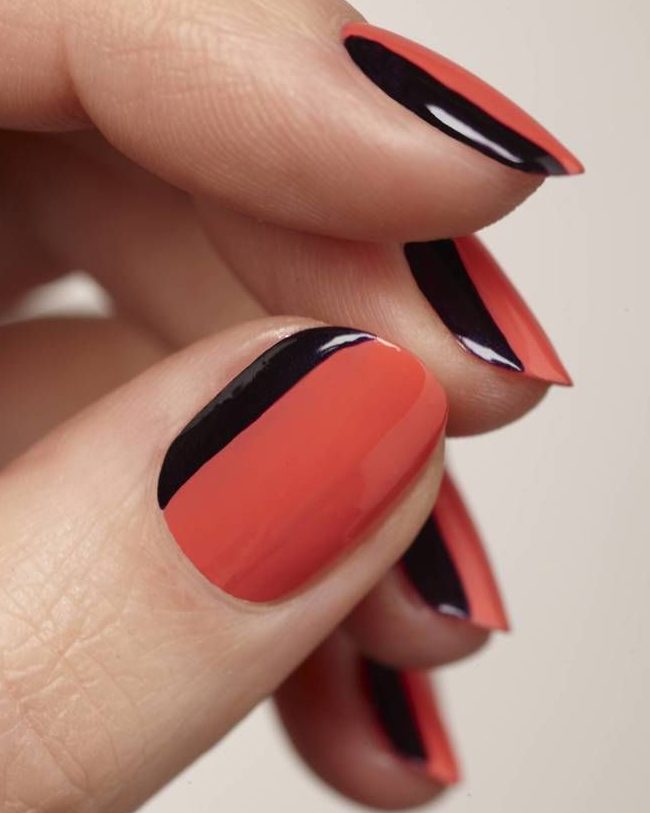
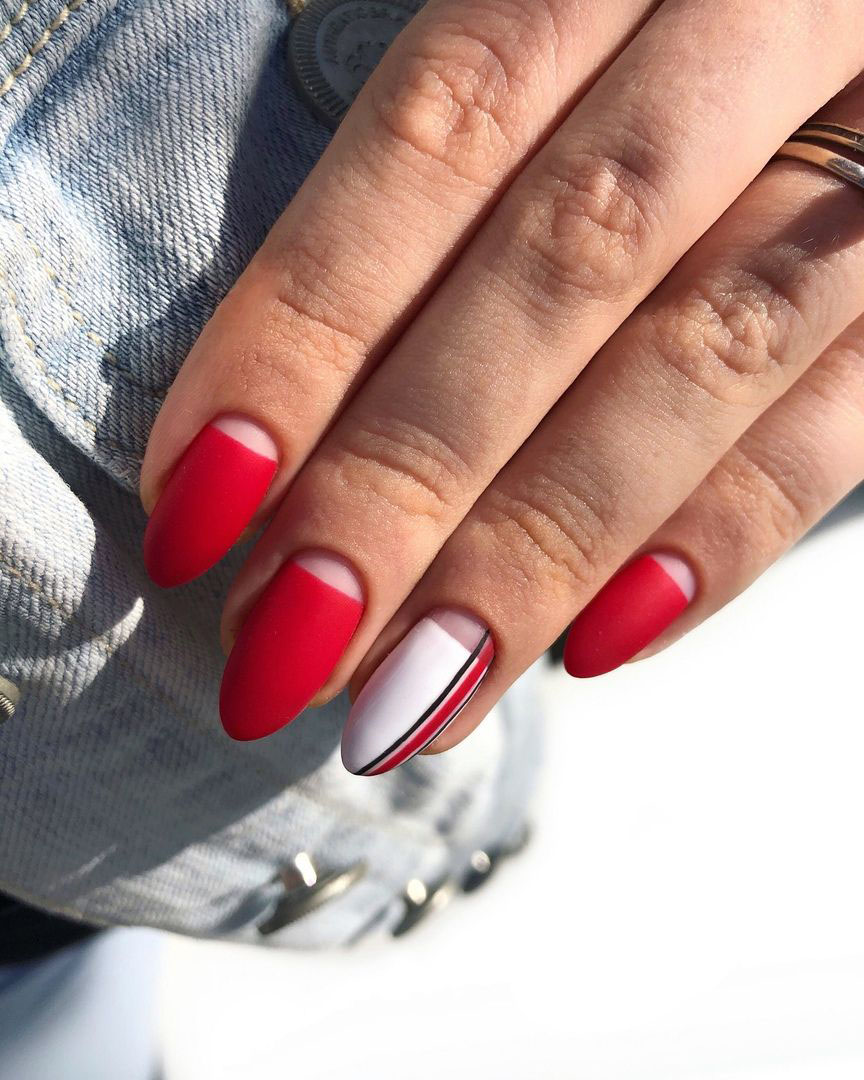
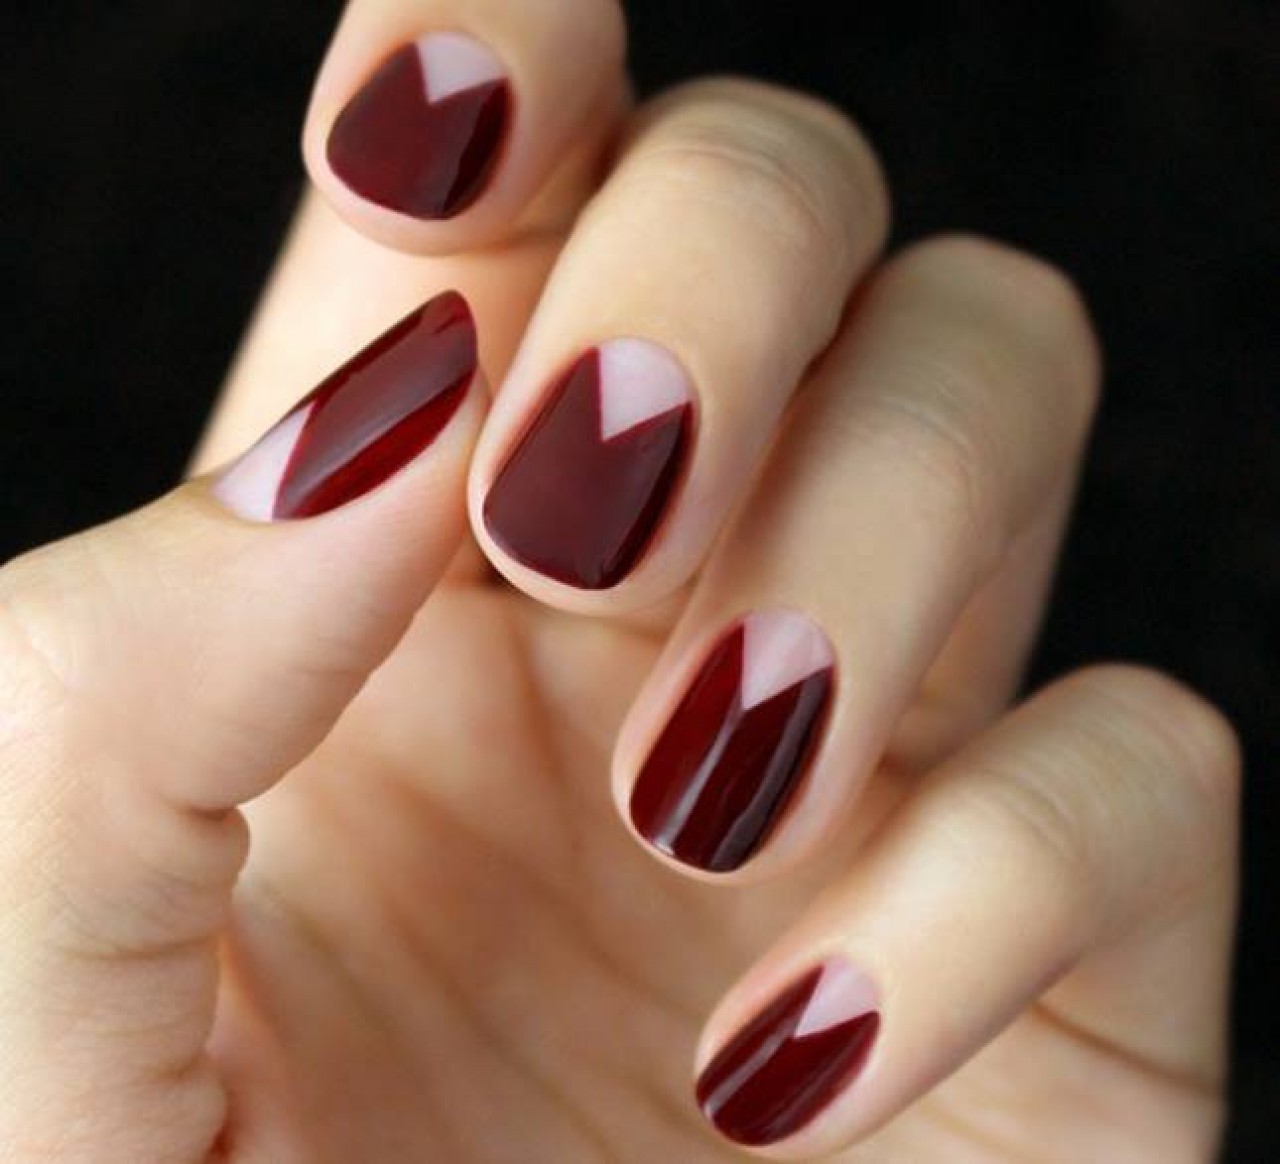
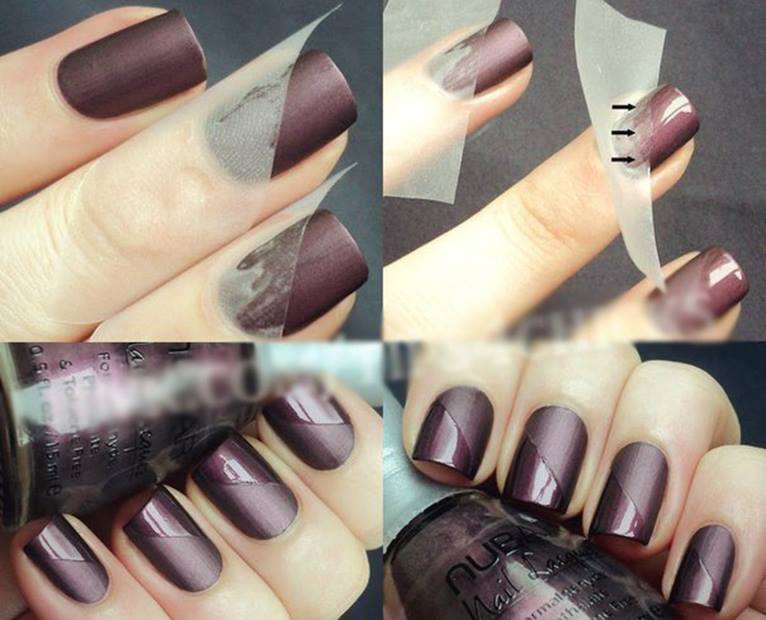
Festive French
The classic approach implies a clear drawing of the smile line, which gives the nails a natural and elegant look. To make things easier, manufacturers of nail art products have come up with special stickers, which can be found on every corner.
But what if they were not at hand, and you need a jacket as soon as possible?
Scotch tape will come to the rescue.
In the traditional version, smiles with rounded edges are drawn, but this cannot be done with duct tape and other similar devices. Such nail art is best done on short nails. Slim and straight piping looks harmonious in a small footprint.
However, cunning women of fashion have come up with a way out: you need a small round-shaped cap, for example, from varnish. A piece of wide sticky tape is glued onto it, and then cut along the contour to make a semicircle. You need to make ten such blanks.
Then everything is as usual: the plate is covered with a background varnish, dried, the forms are glued, colored or white enamel is applied to the tip of the nail, the sticker comes off. It turns out the perfect jacket with the correct rounded edges.
You can reproduce non-standard options: highlight the free edge of the nail or the hole diagonally or crosswise with contrasting colors.
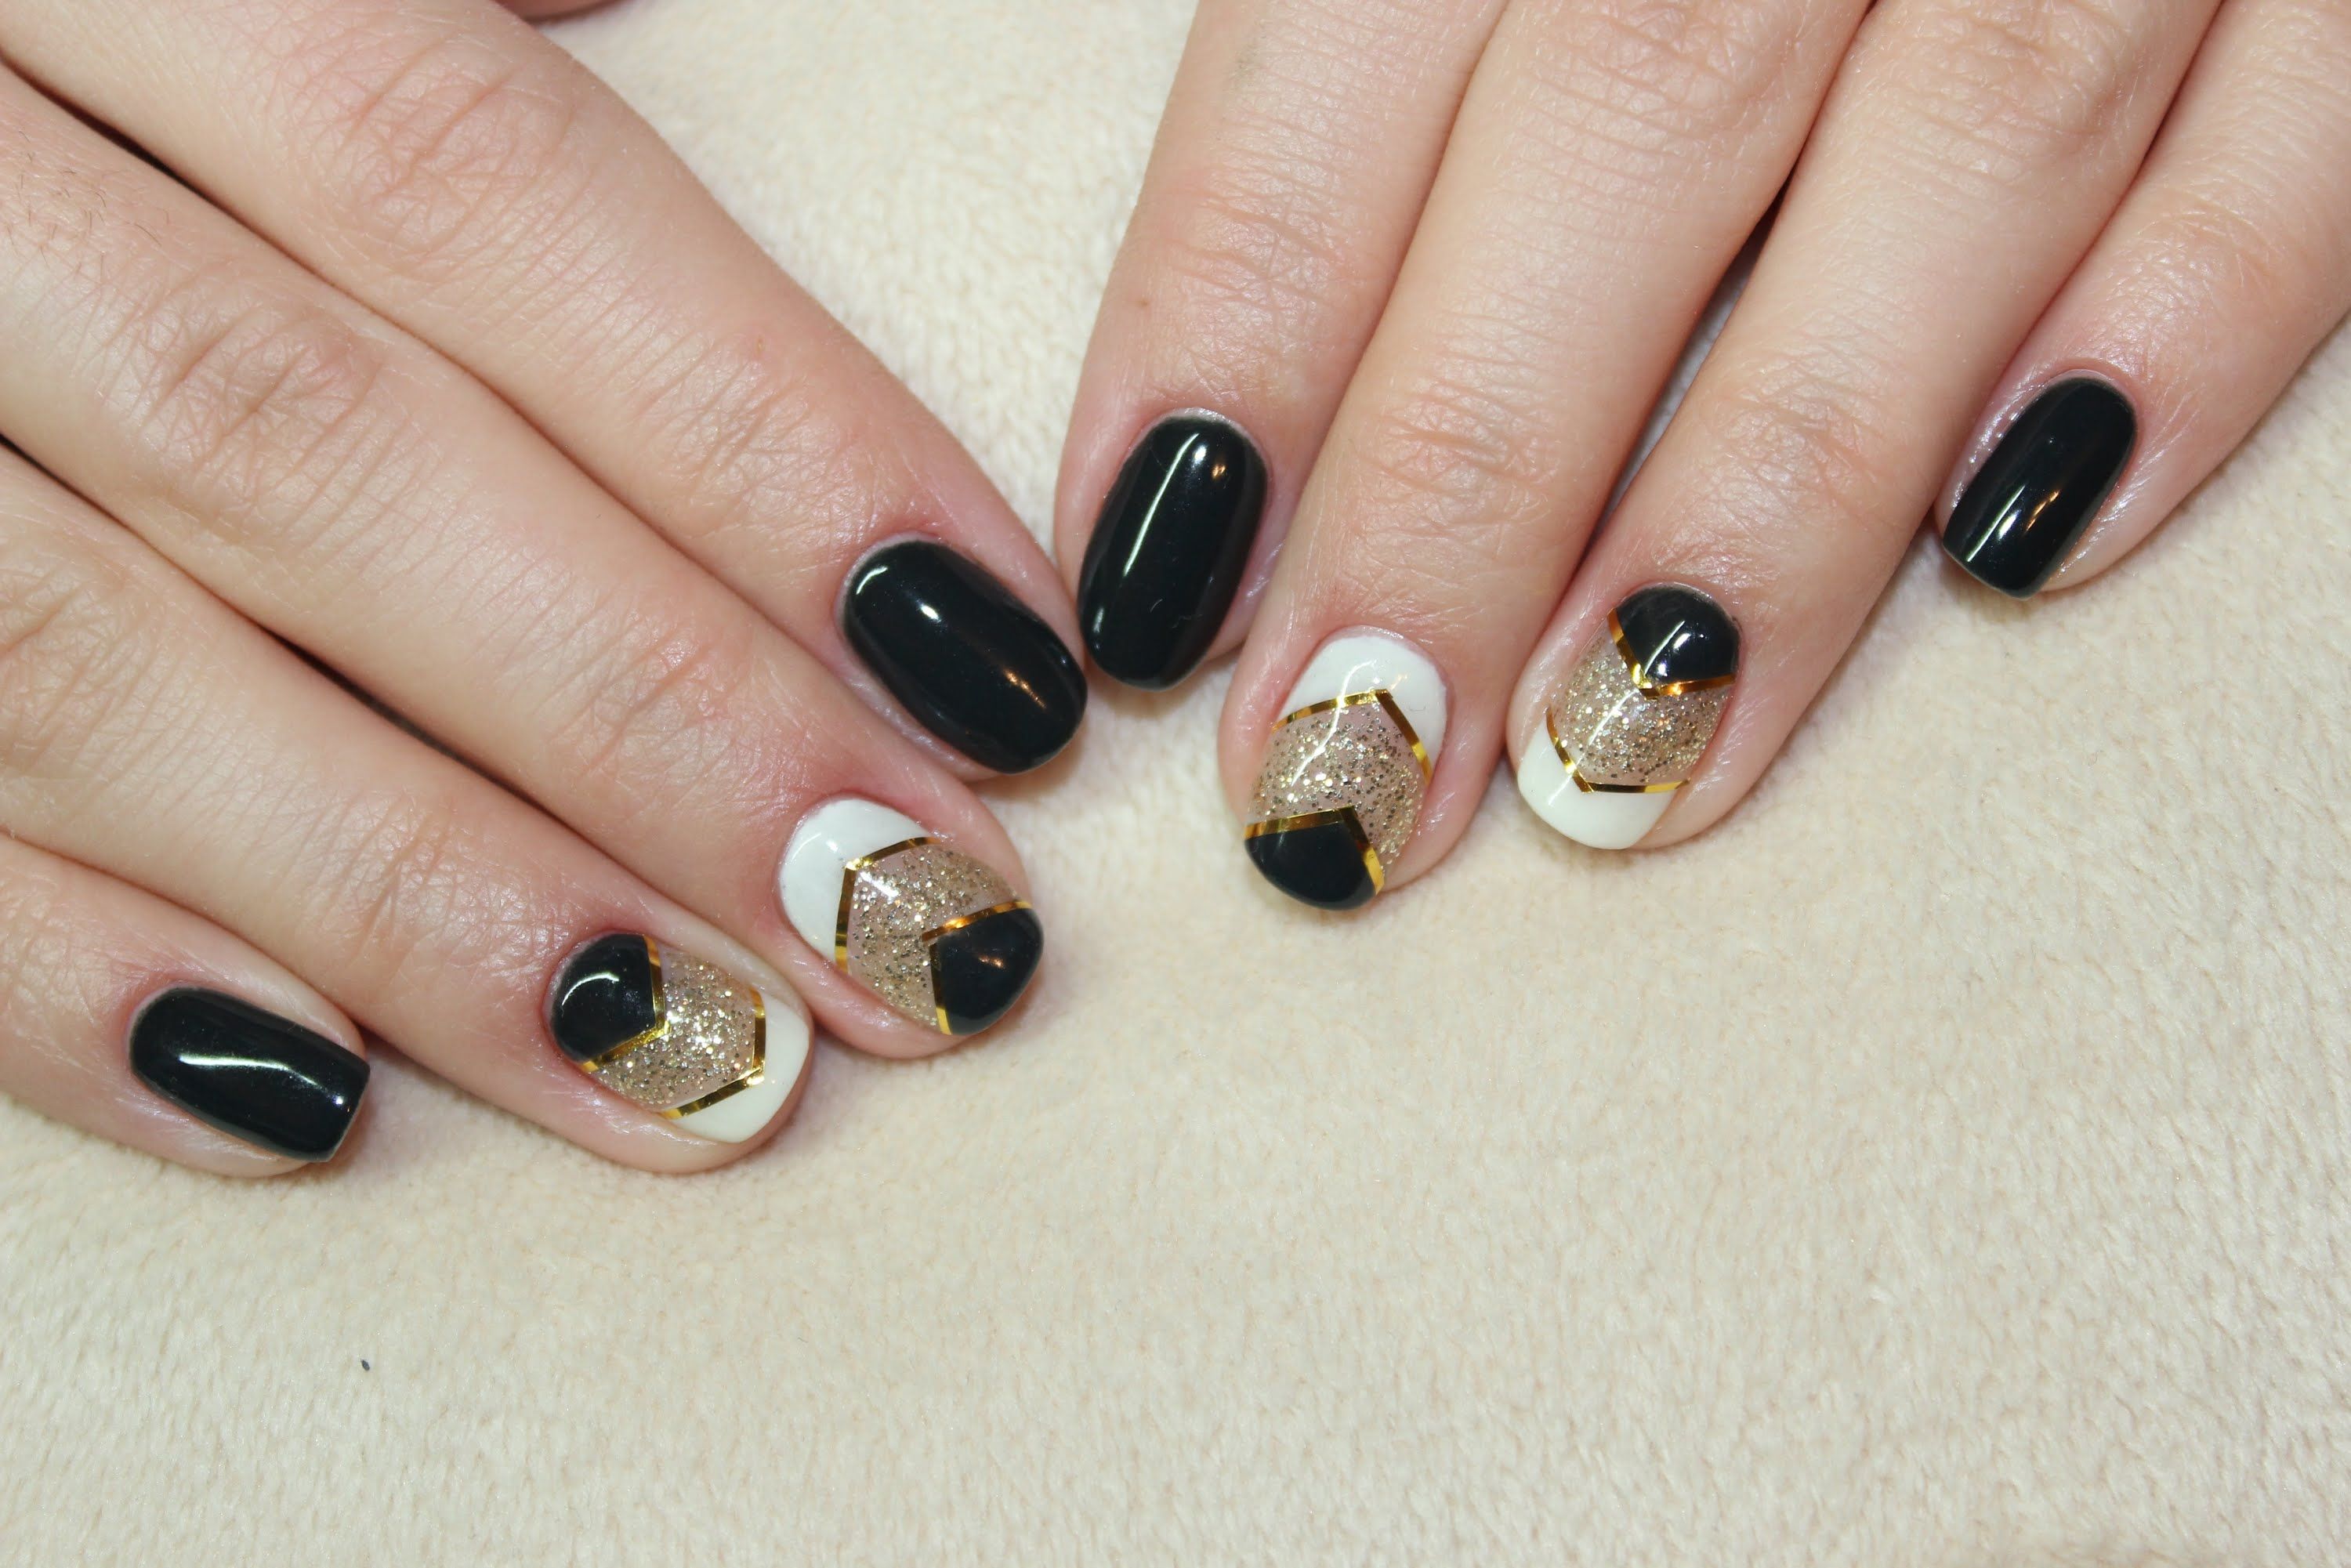
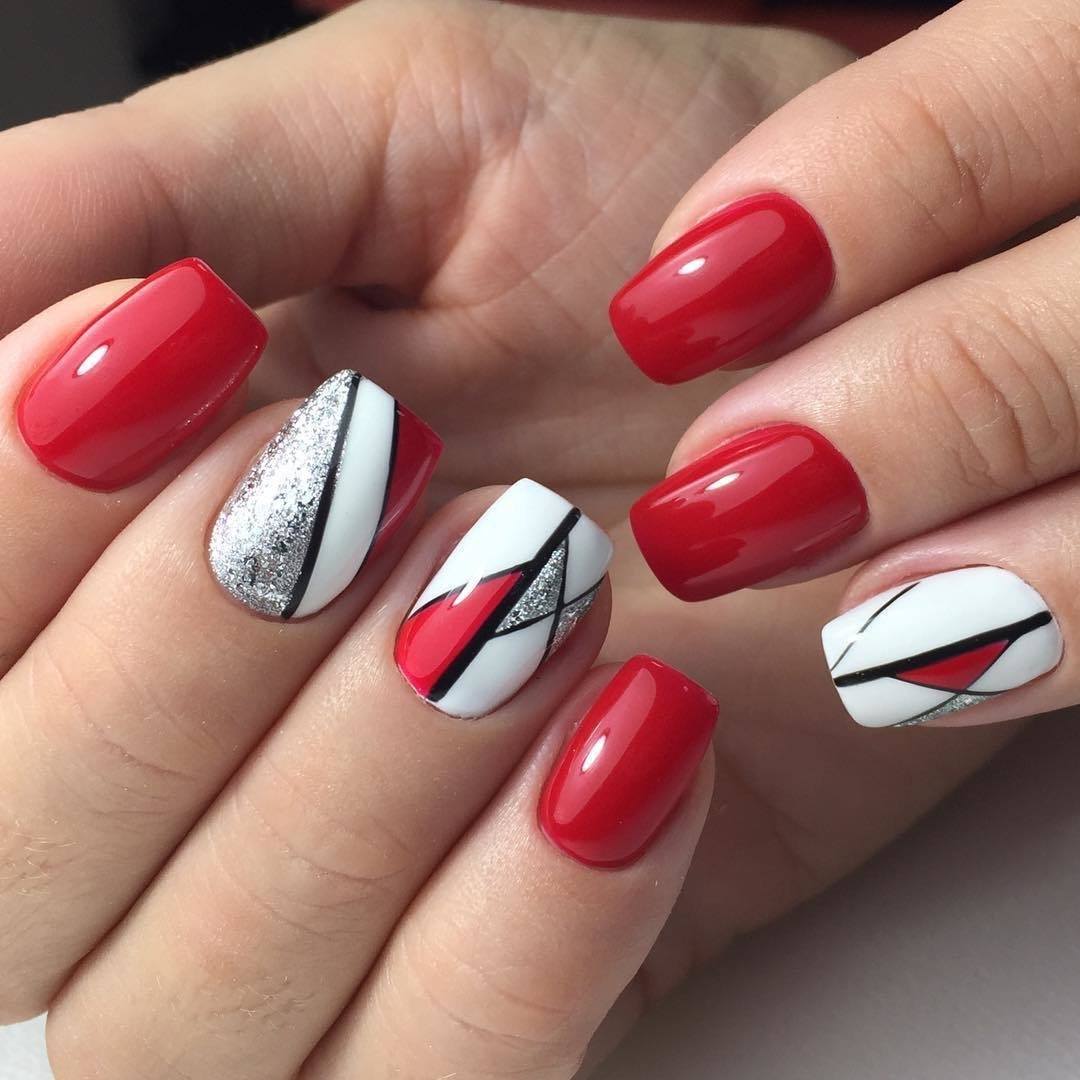
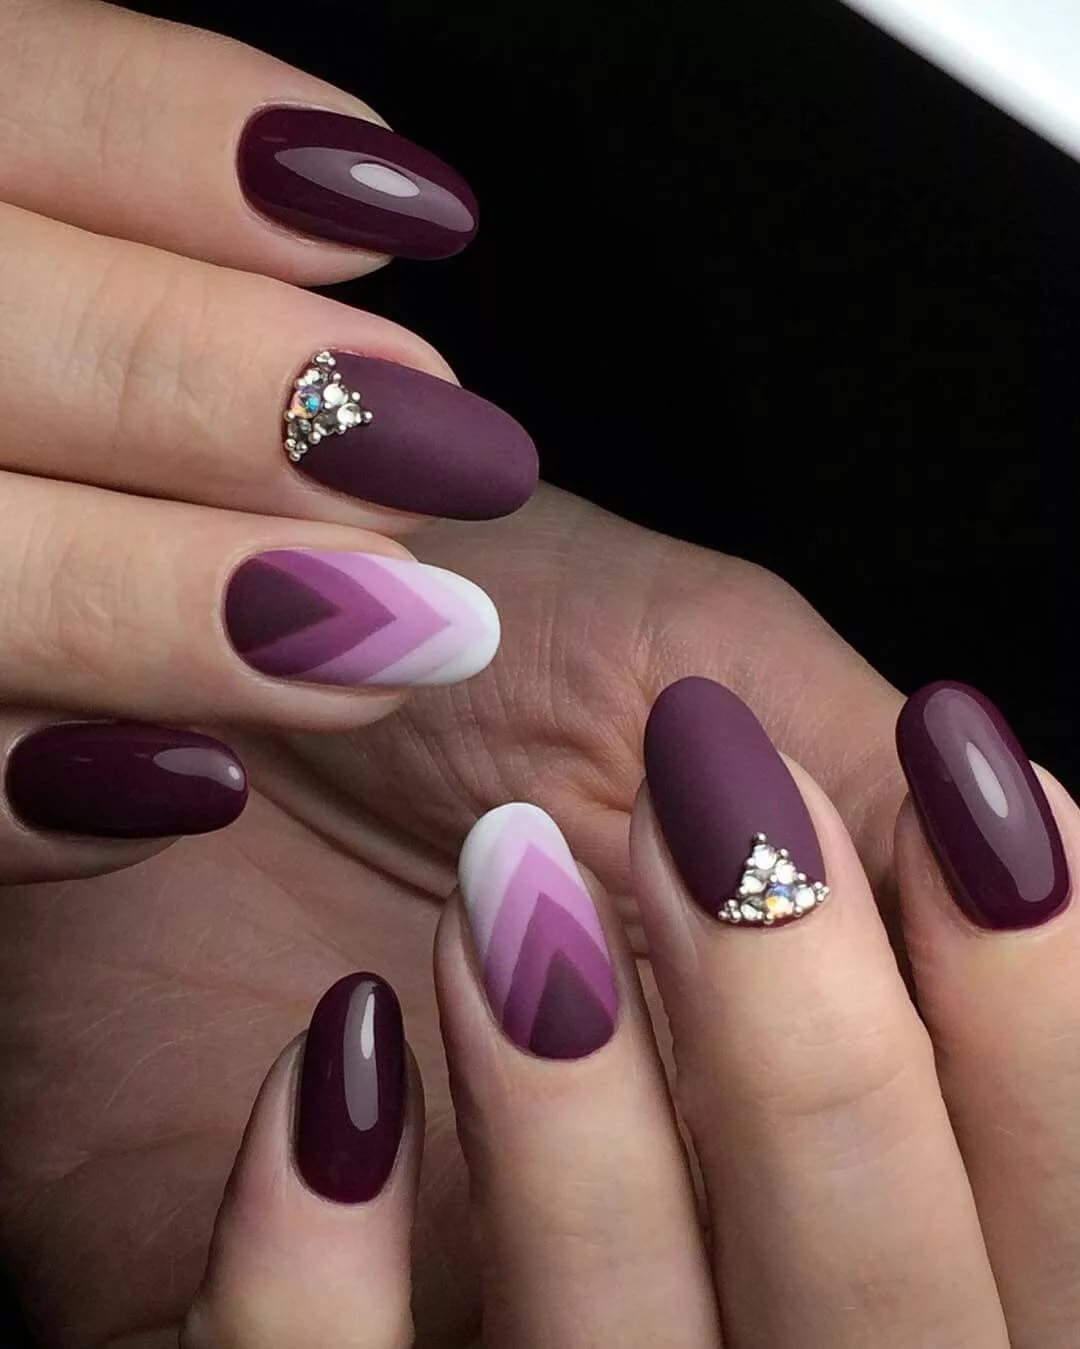
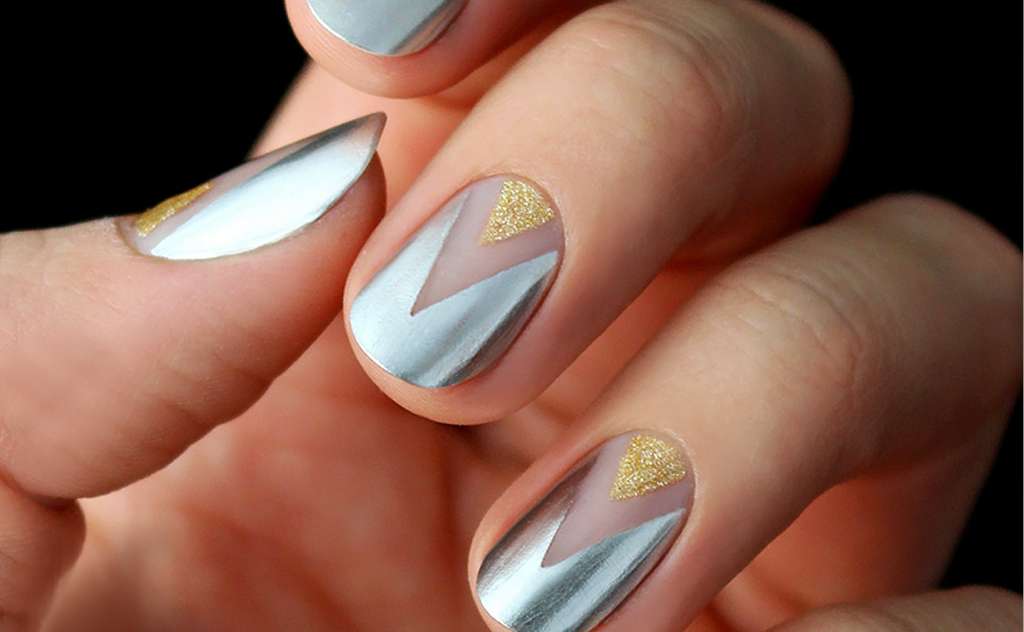
As for the chosen colors - today the classic consonance of white and nude is less valued than before. For casual looks, choose unusual combinations. For example, combinations of wine and beige, black and silver, red and gold, deep green and cream are good.
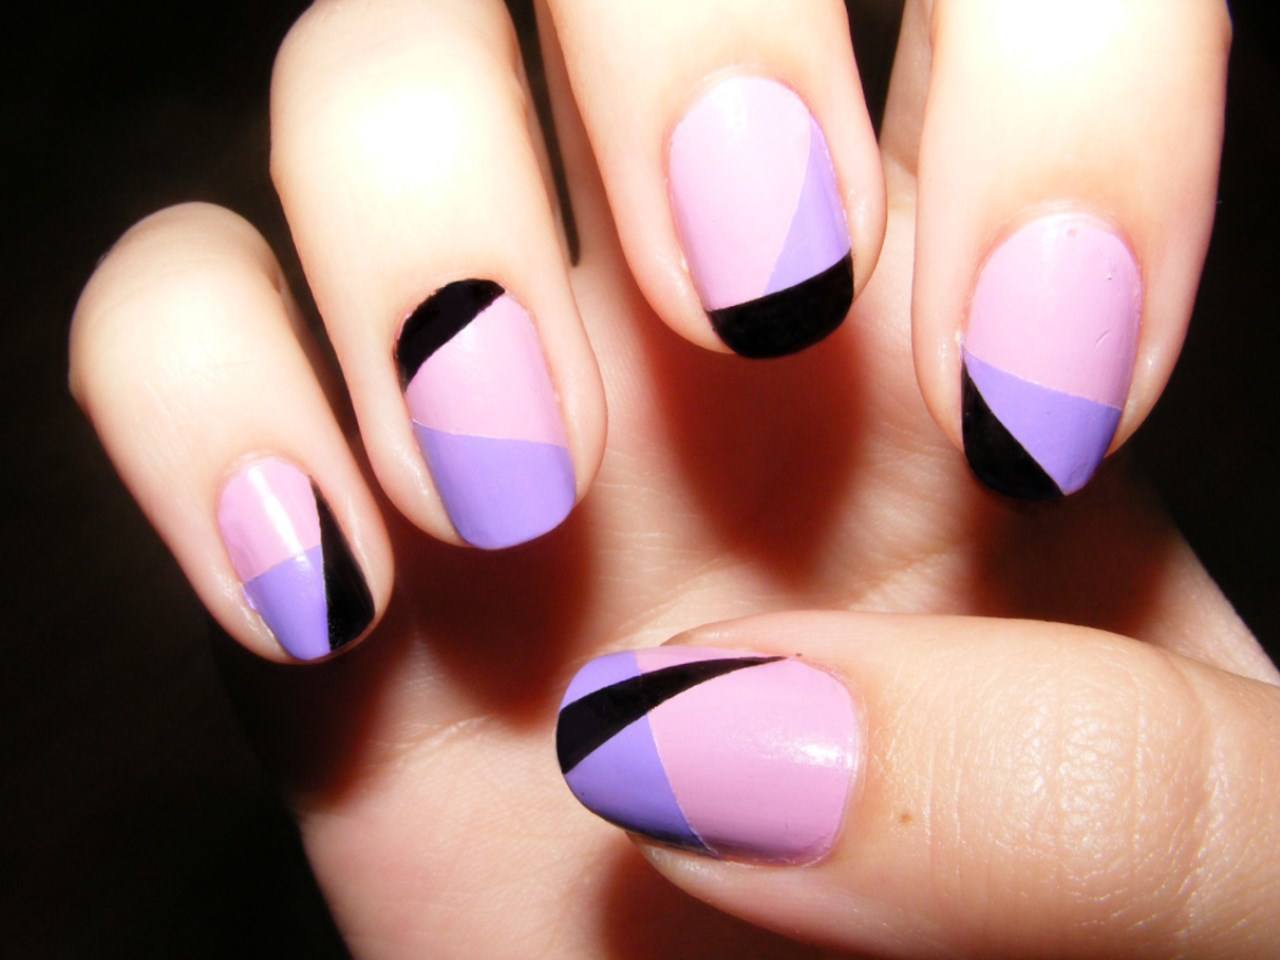
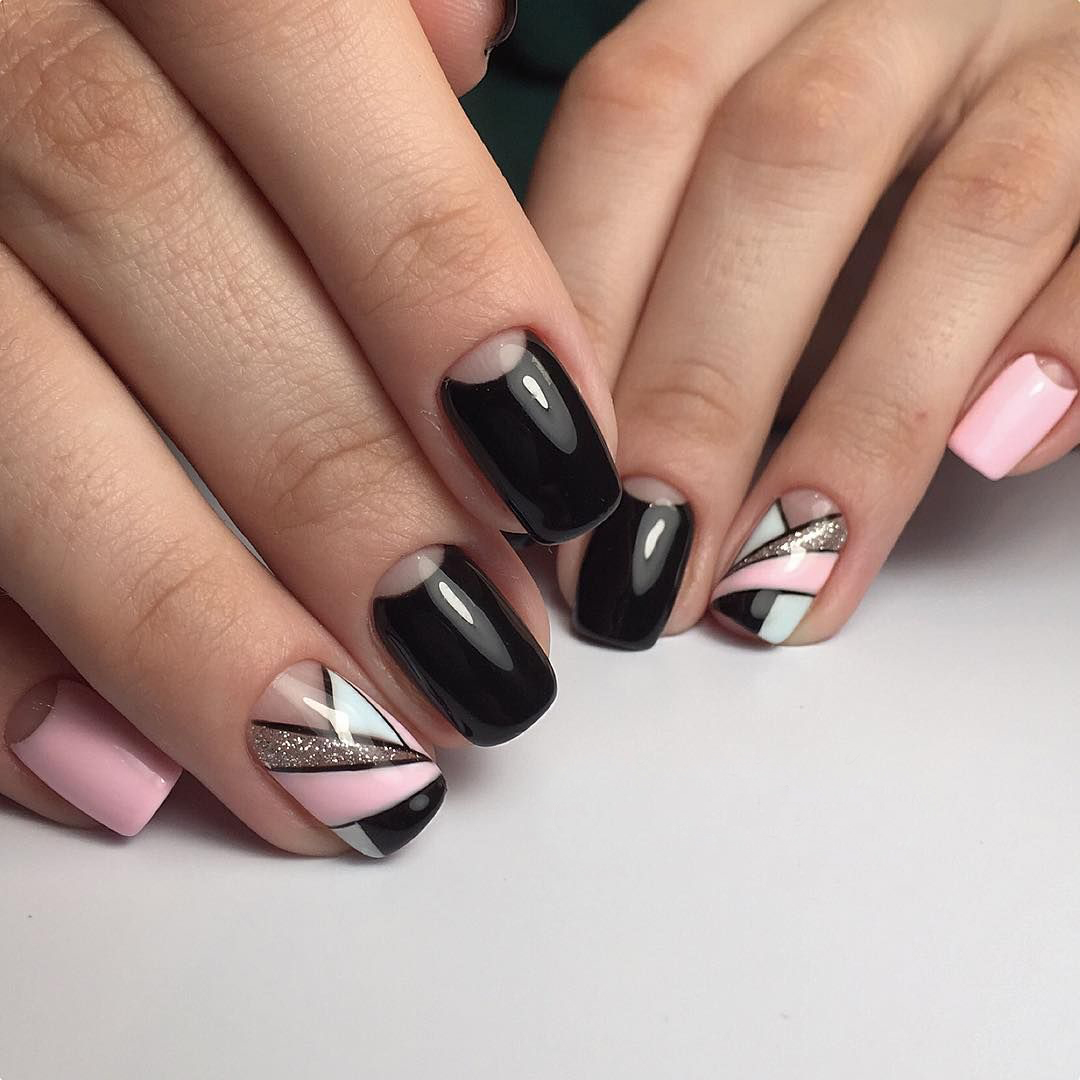
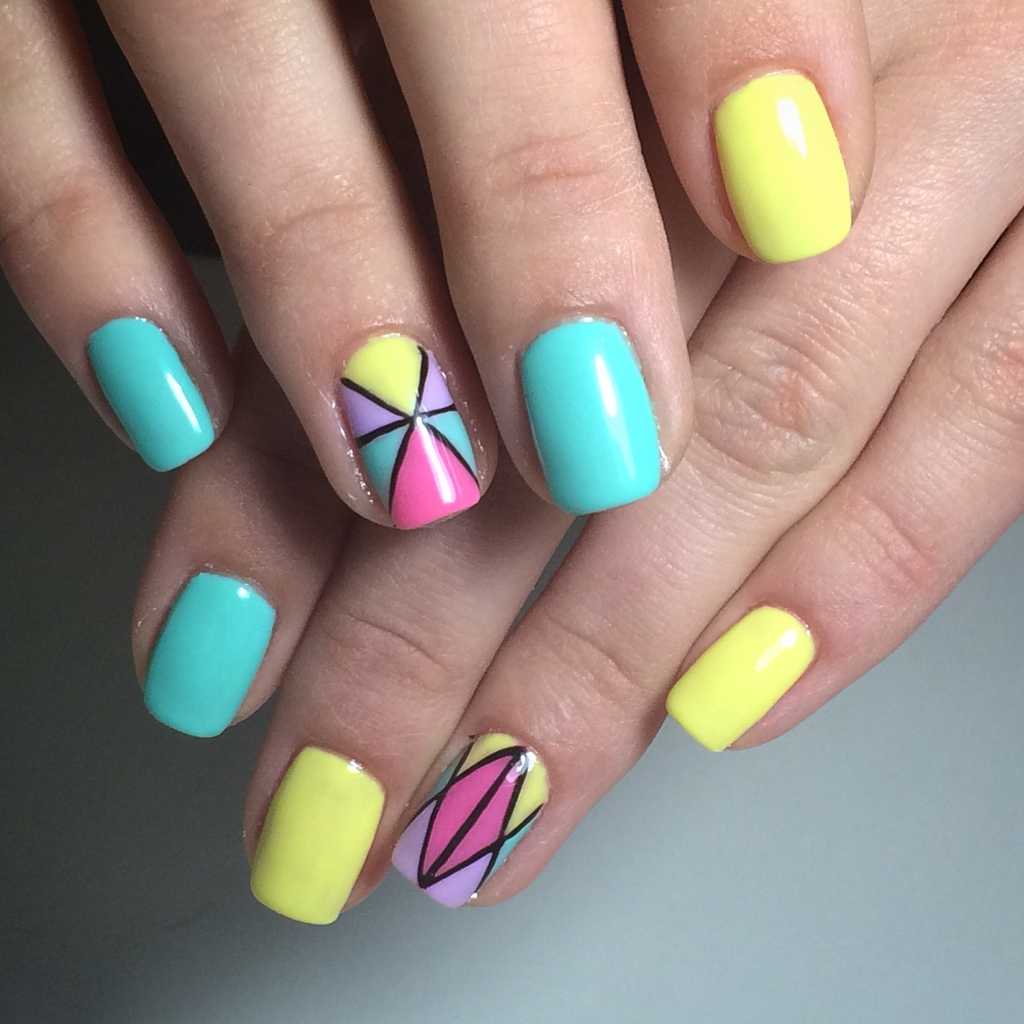
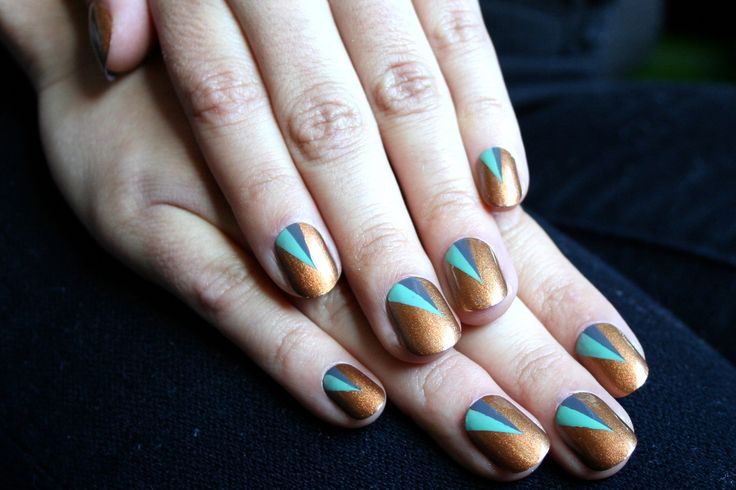
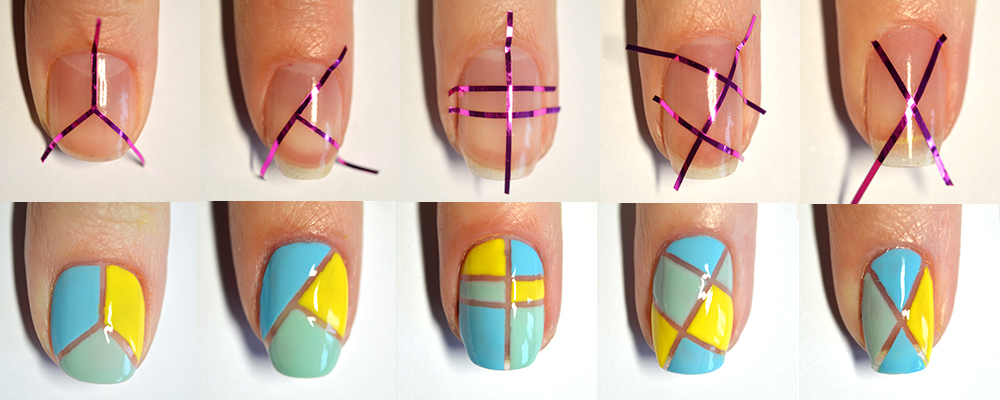
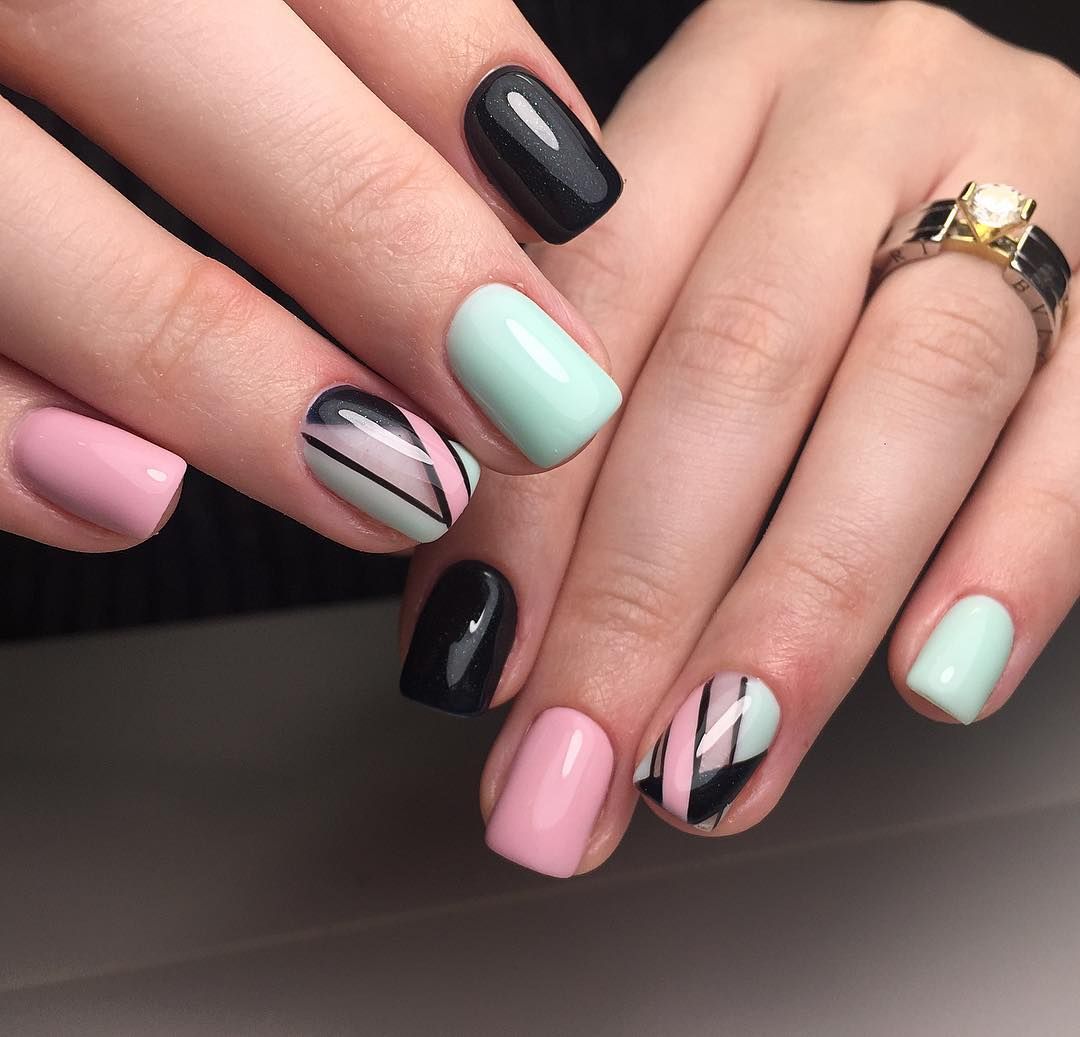
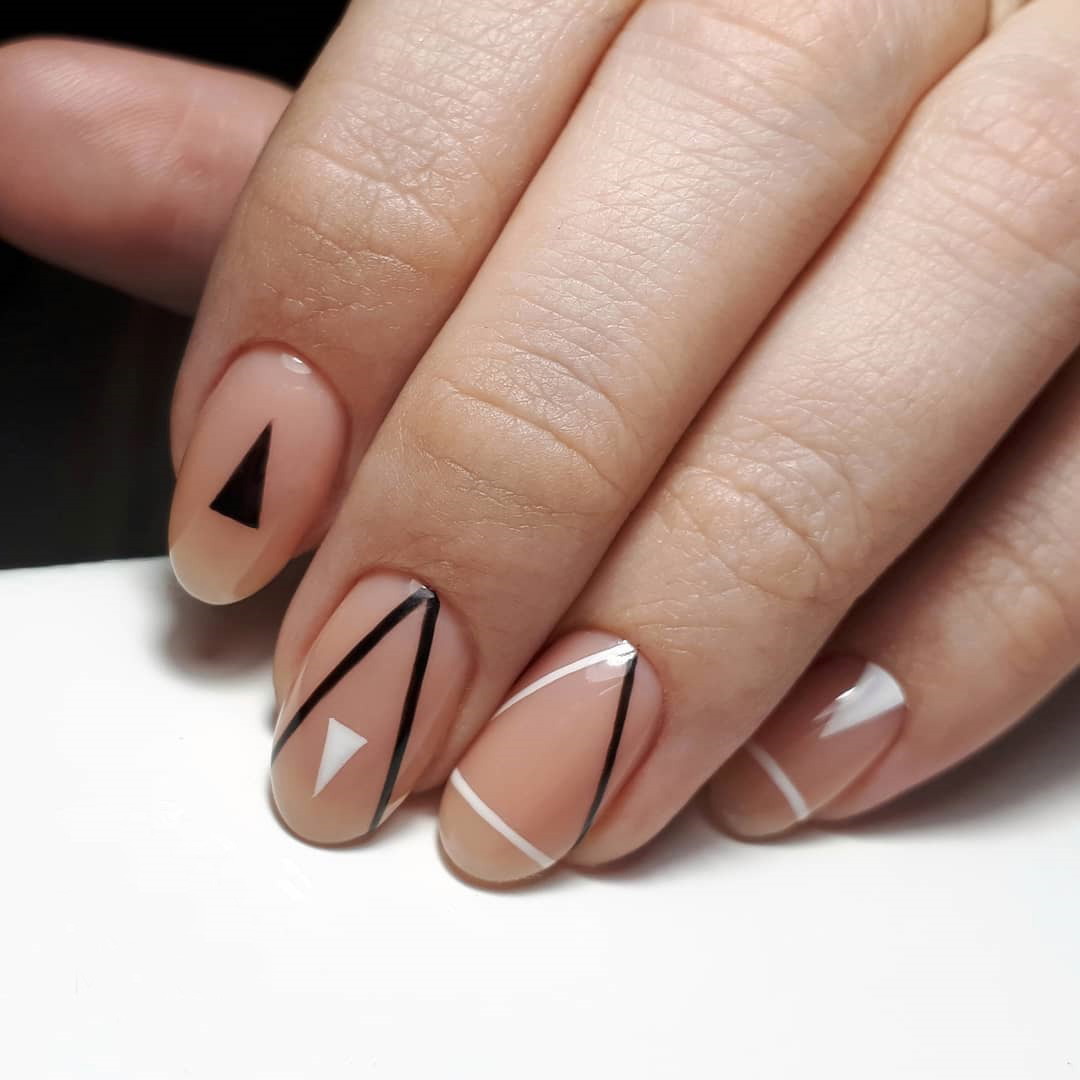
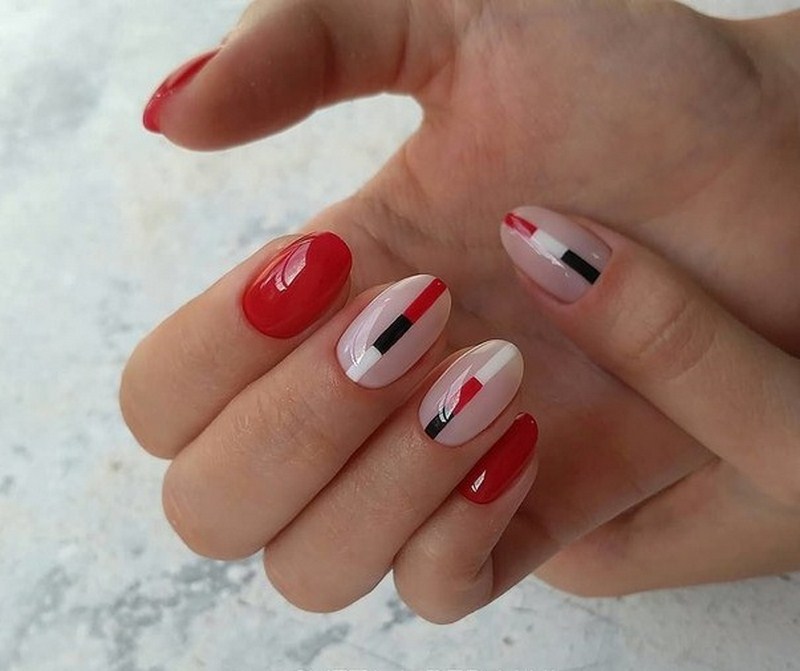
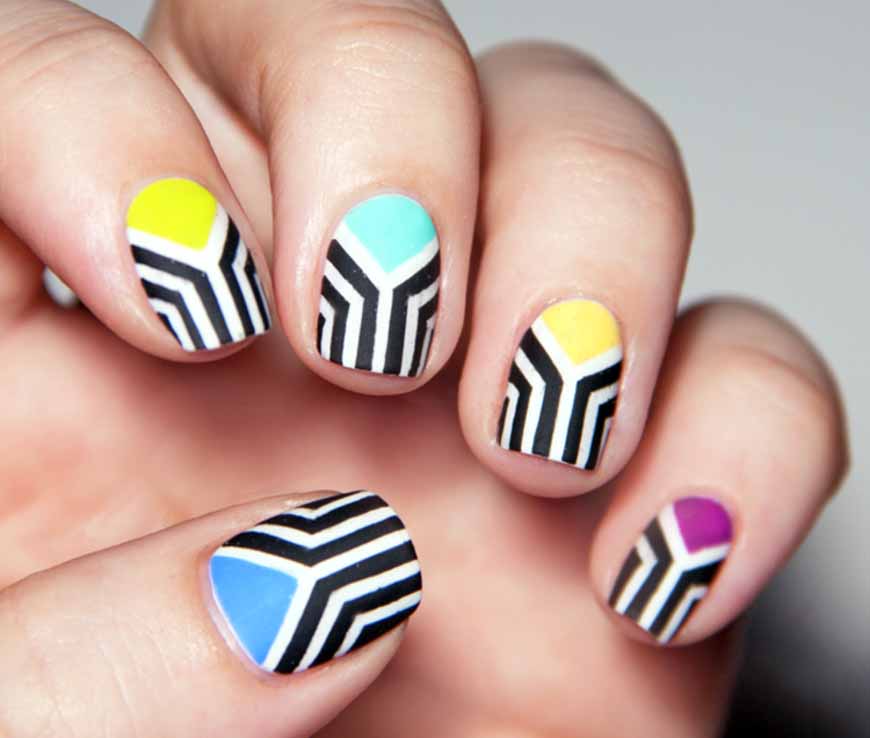
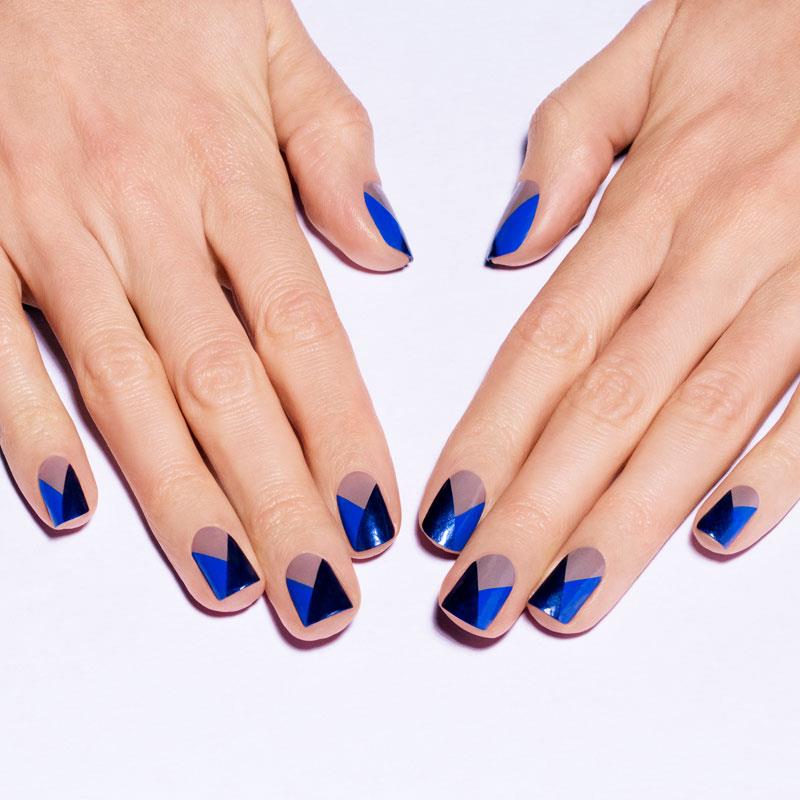
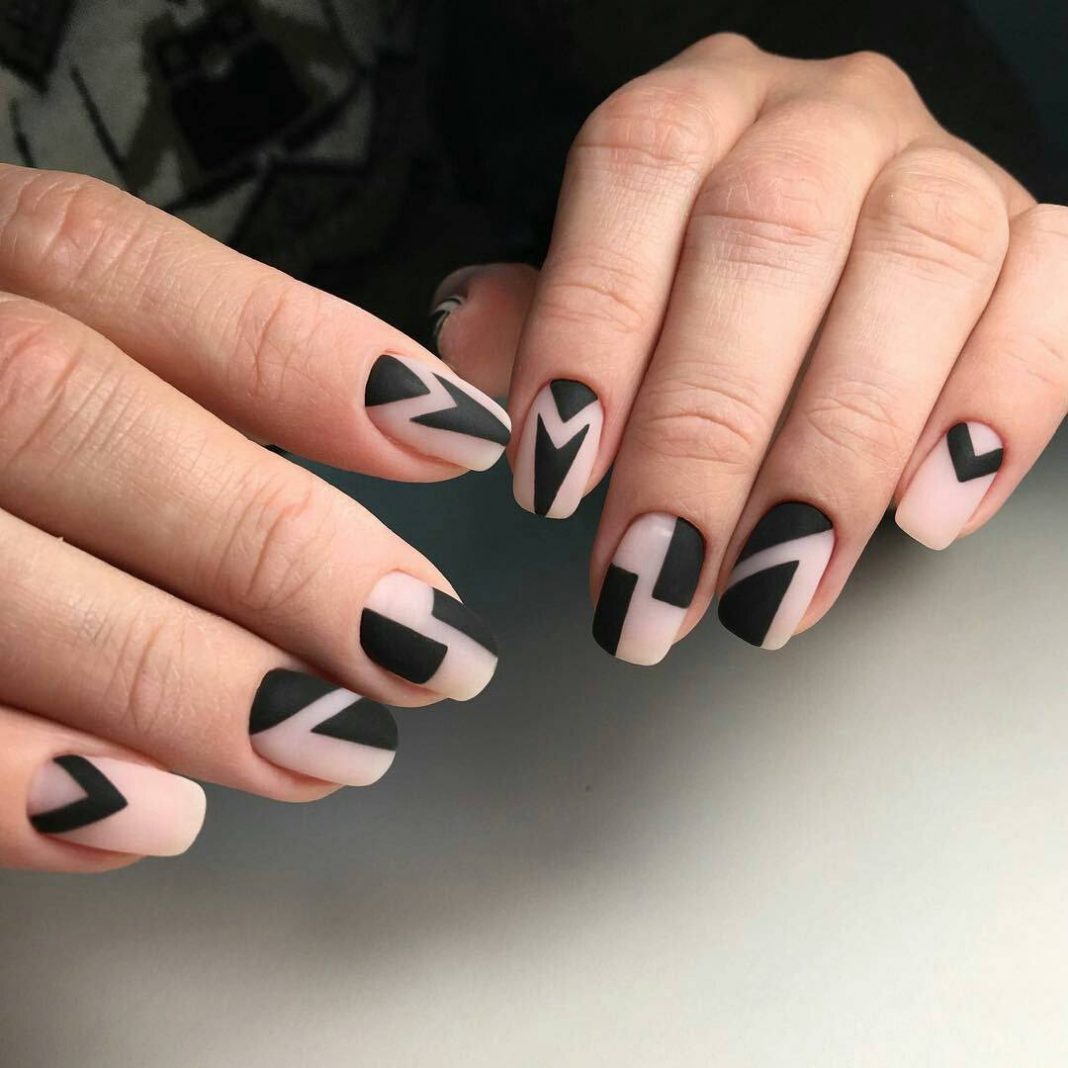
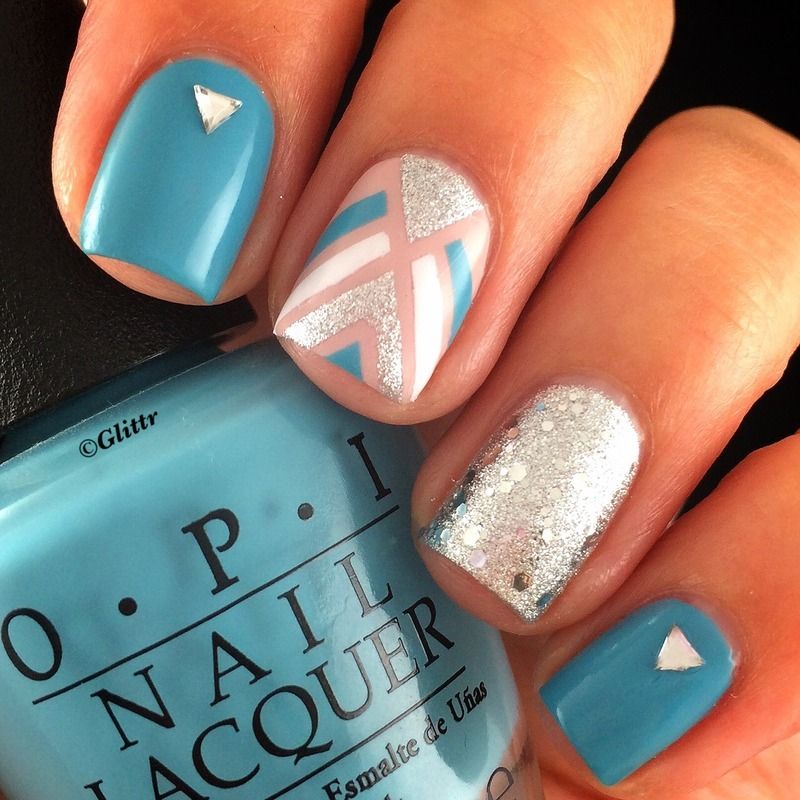
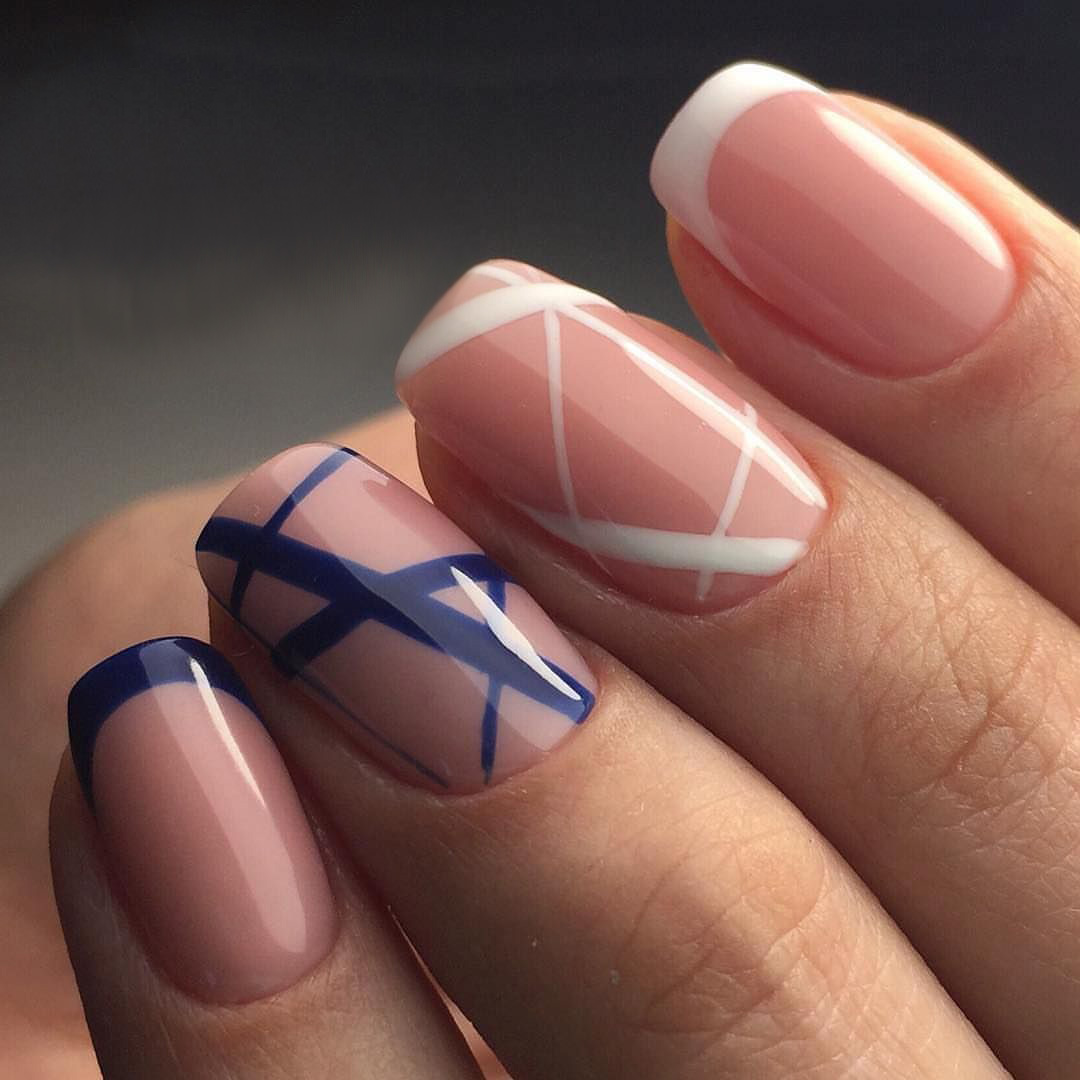
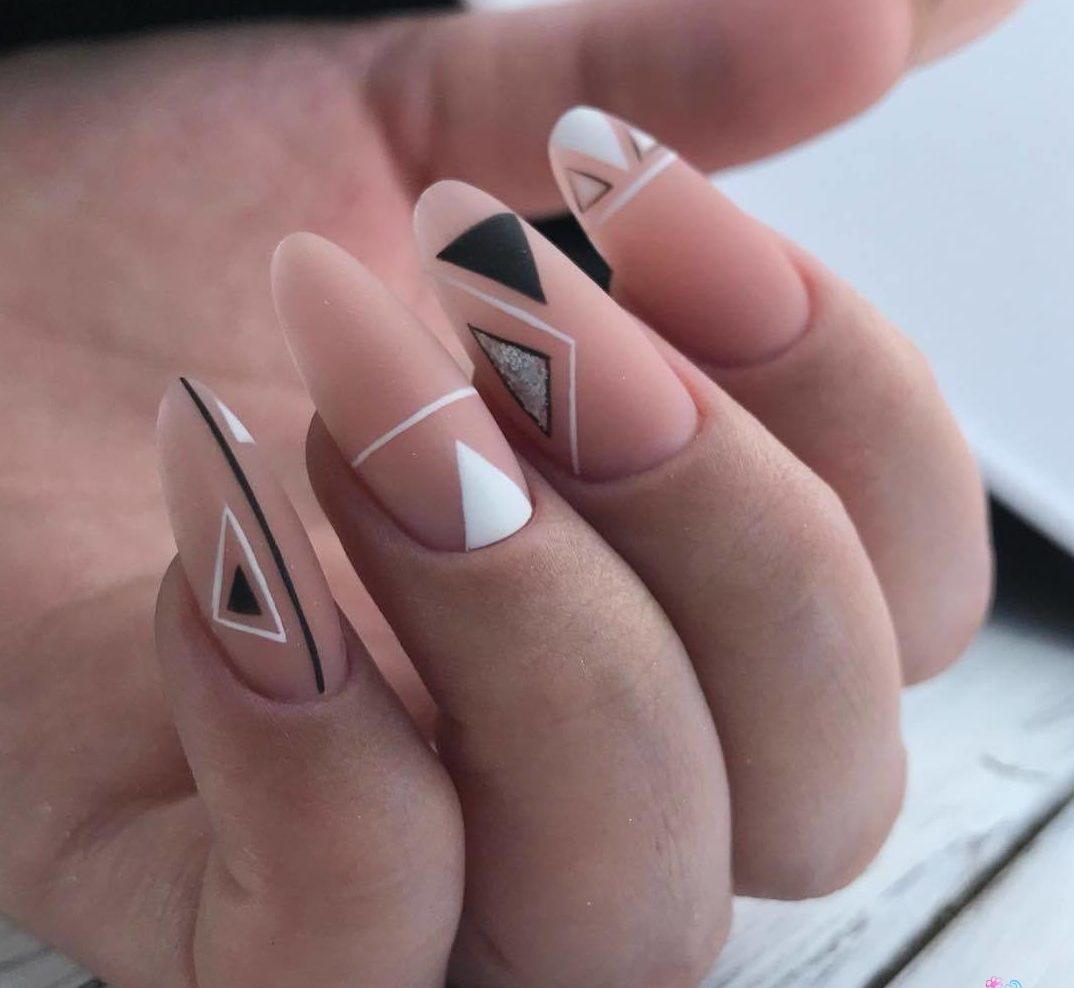
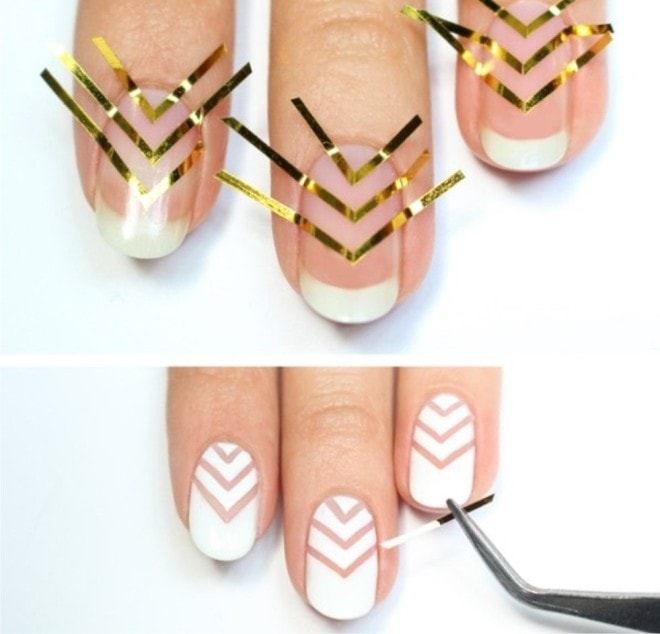
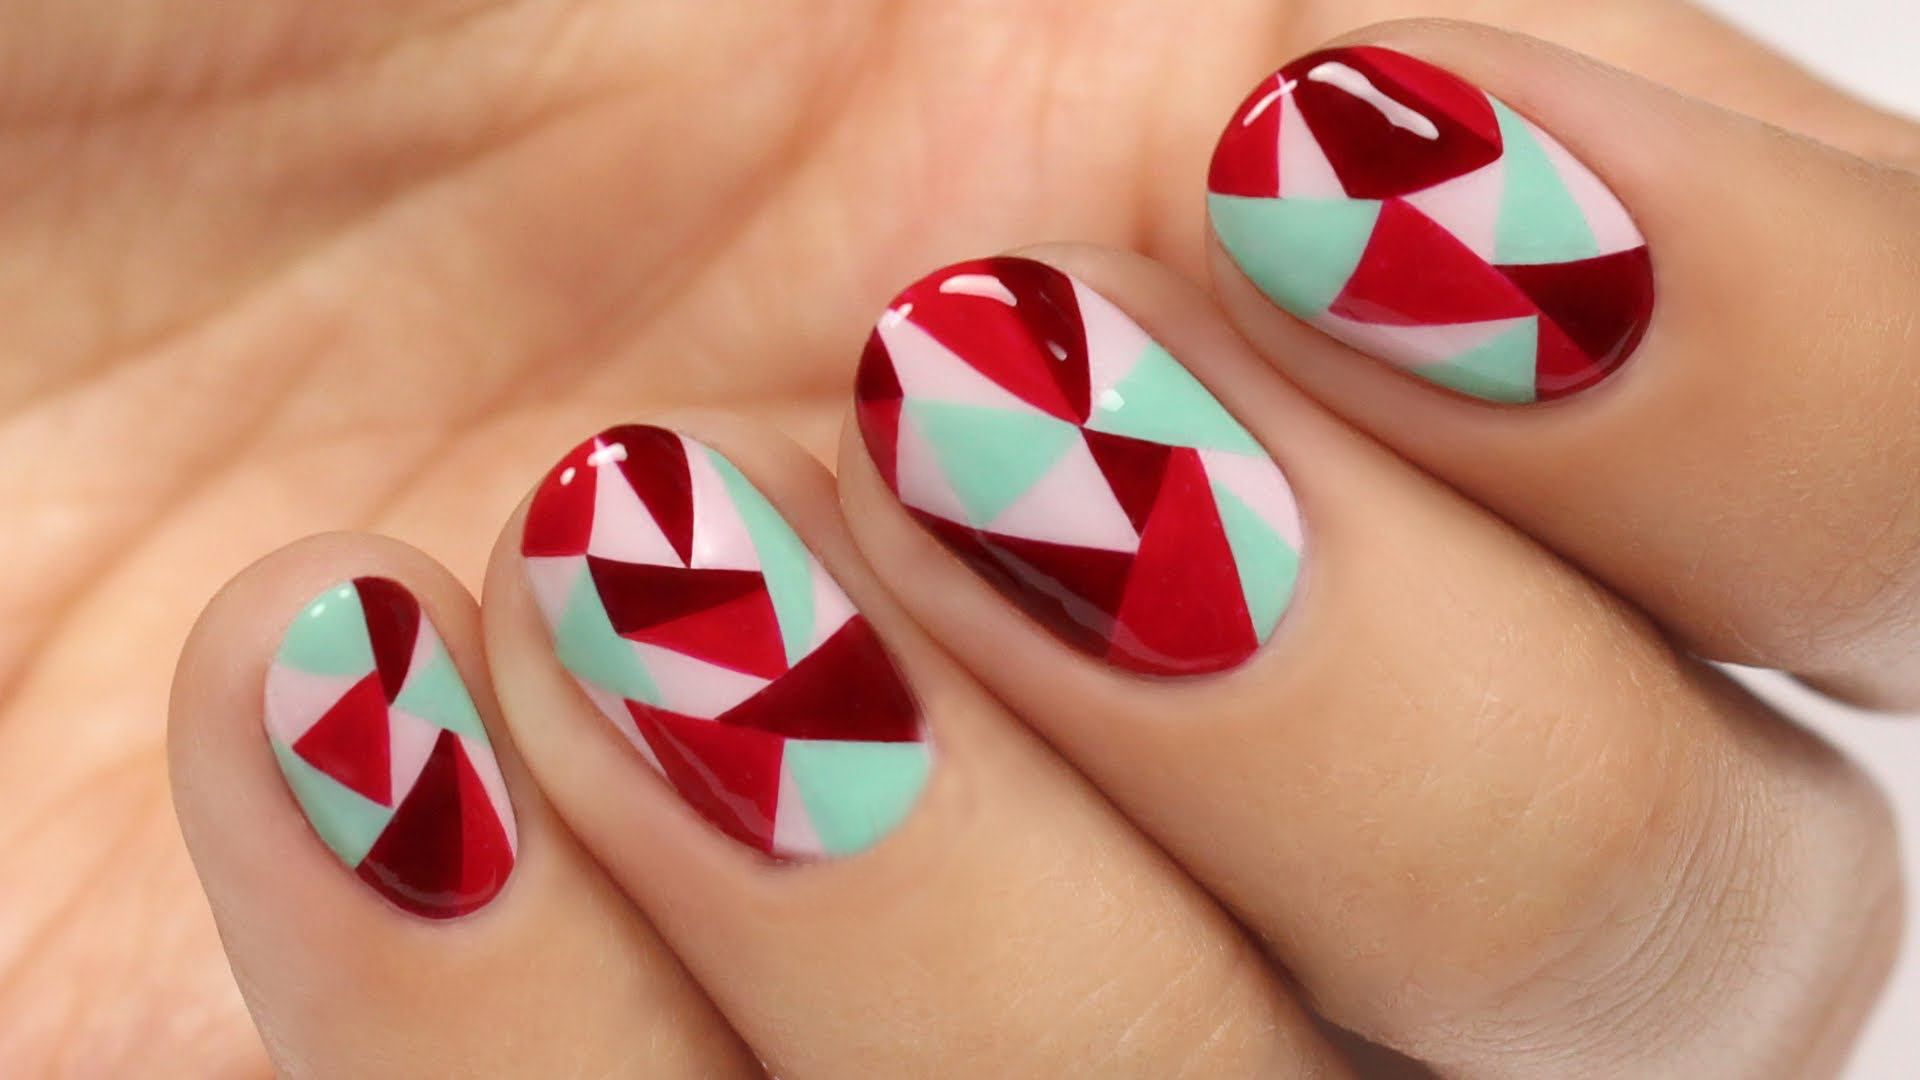
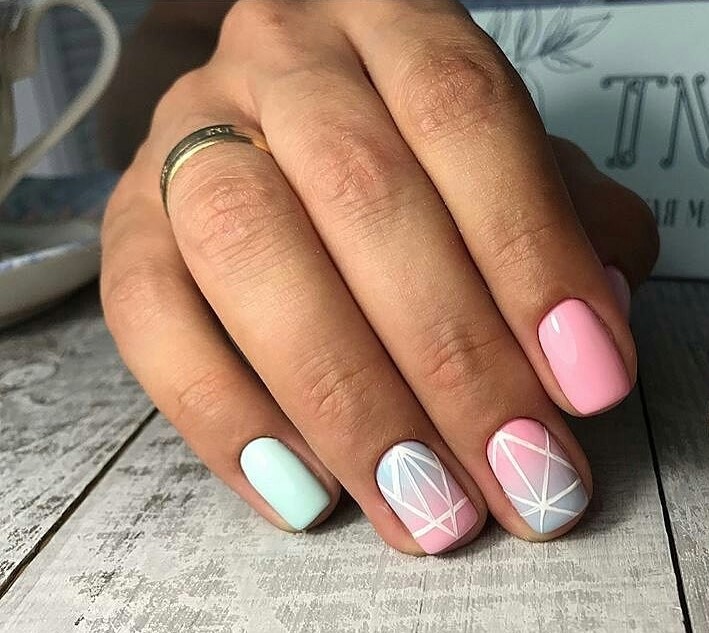
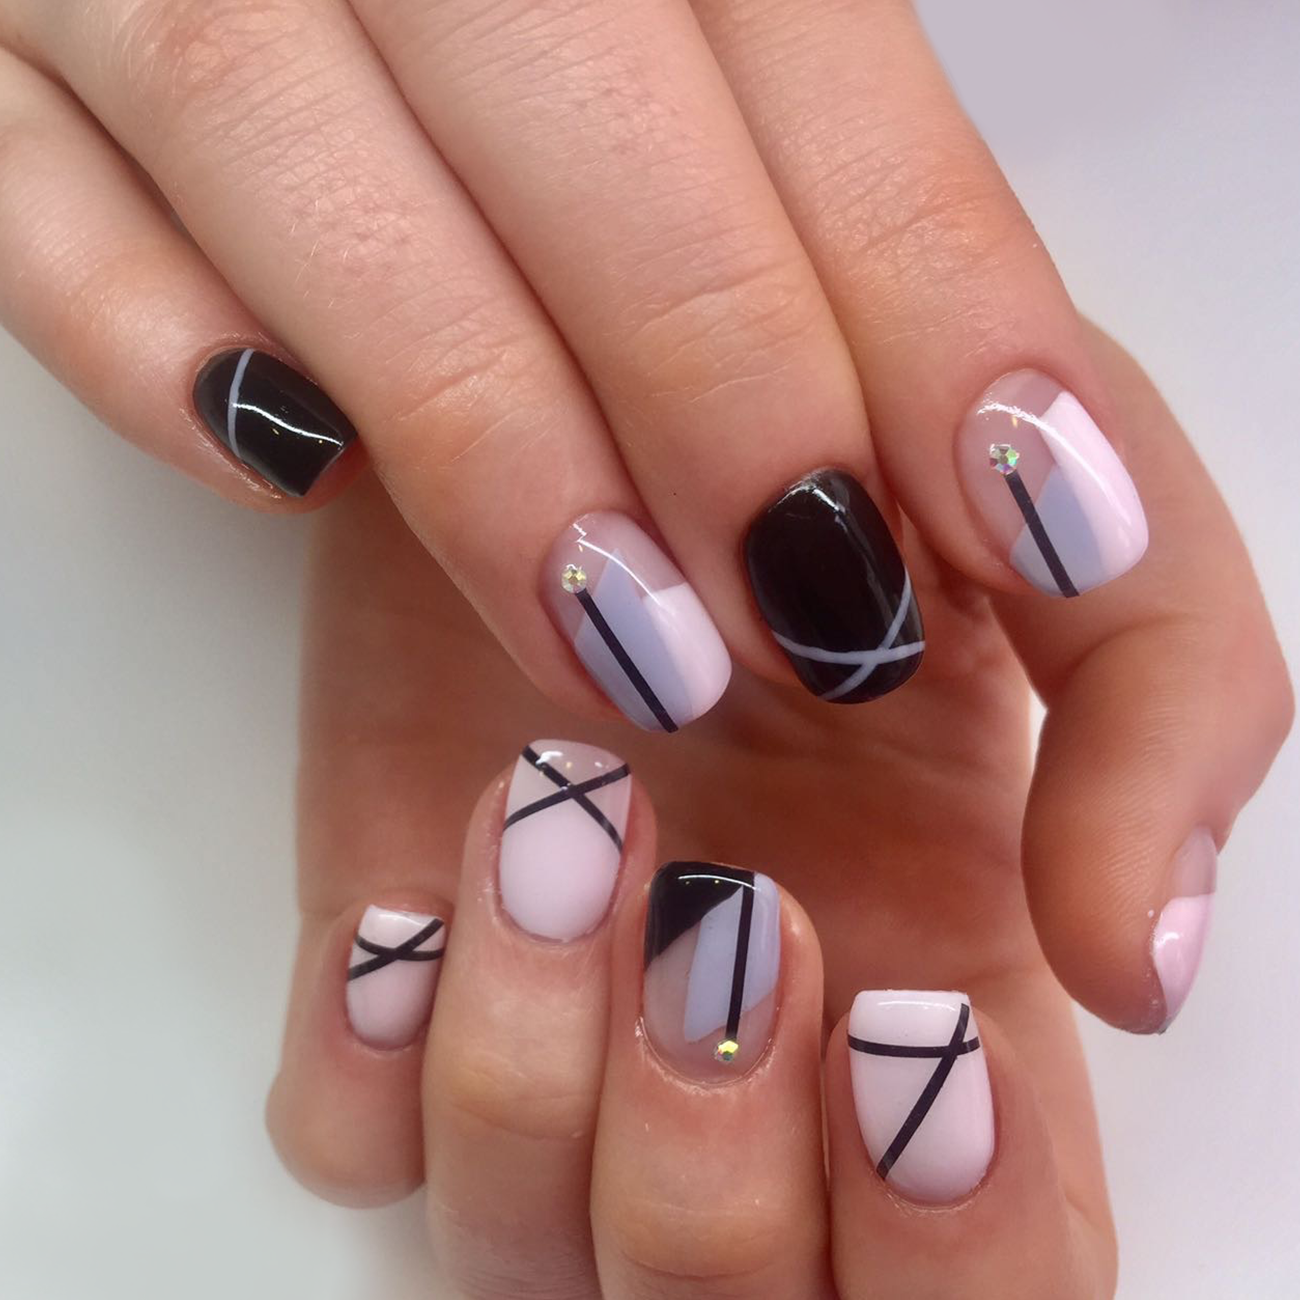
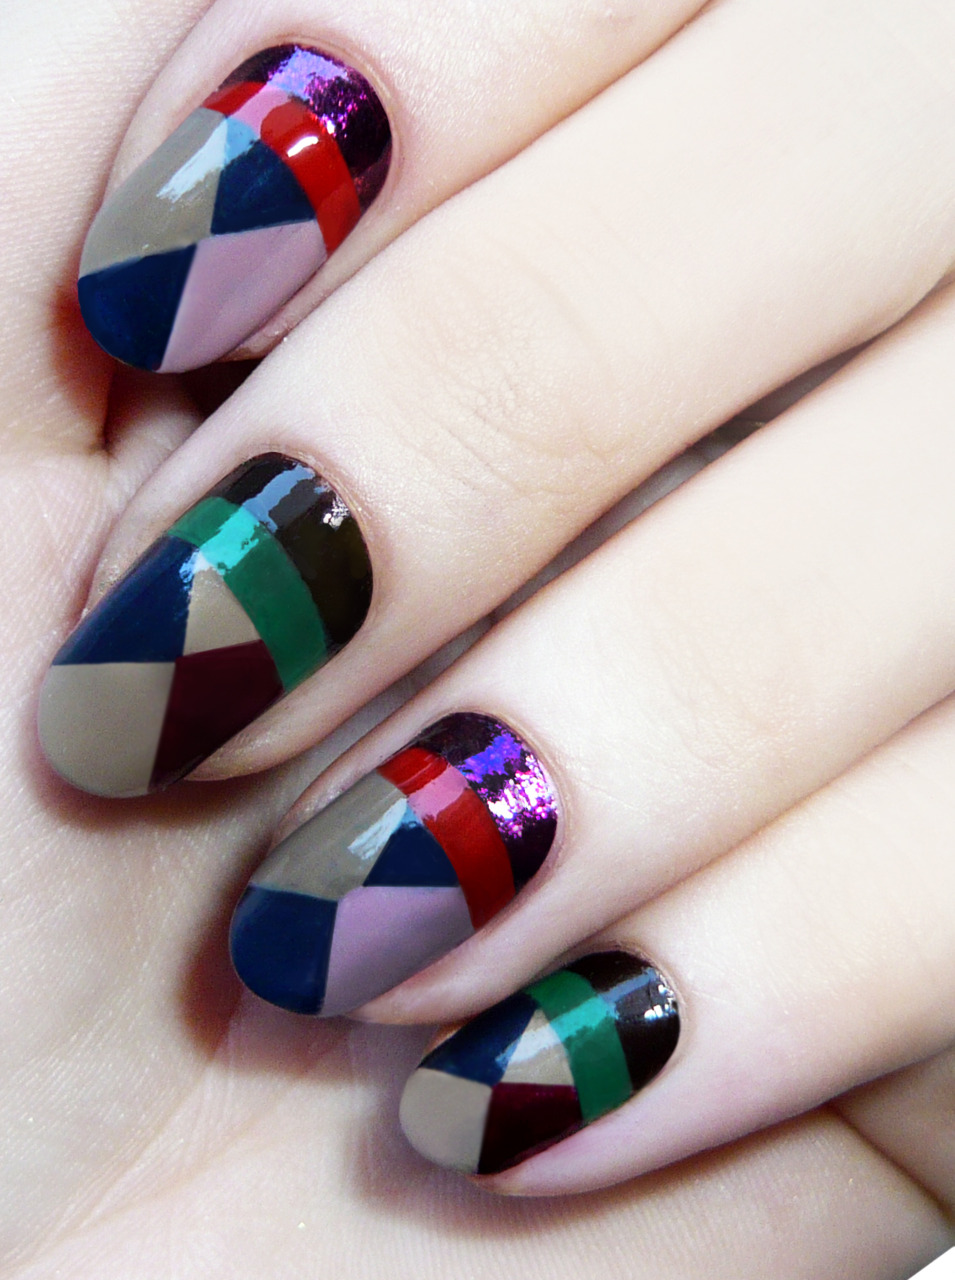
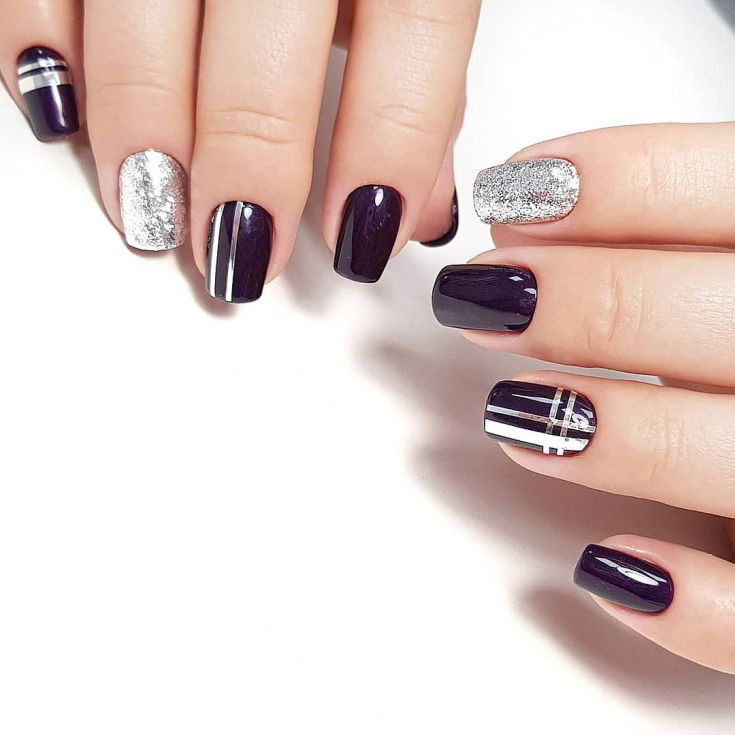
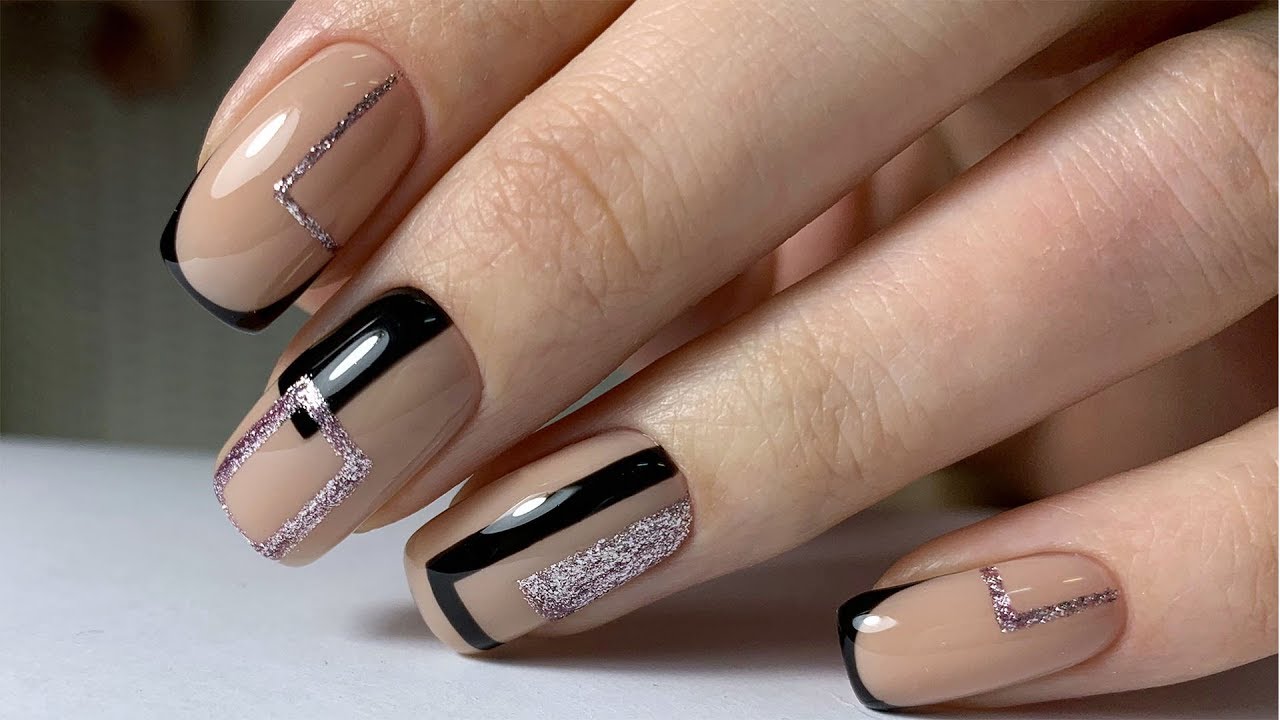
Bright geometry
Design geometry remains one of the most demanded for many seasons. Agree that manually drawing shapes, so much so that they are even and neat, is not an easy task. And again, the miracle tape will help us.

Just glue those areas that will later be painted in a different color. To form triangles, you will need three sticky stripes at once, for a square - four. Play with the arrangement of the picture, try to create a multifaceted composition.
Practice will do the trick, you will be able to fill your hand, and soon the decorating process will take less and less time.
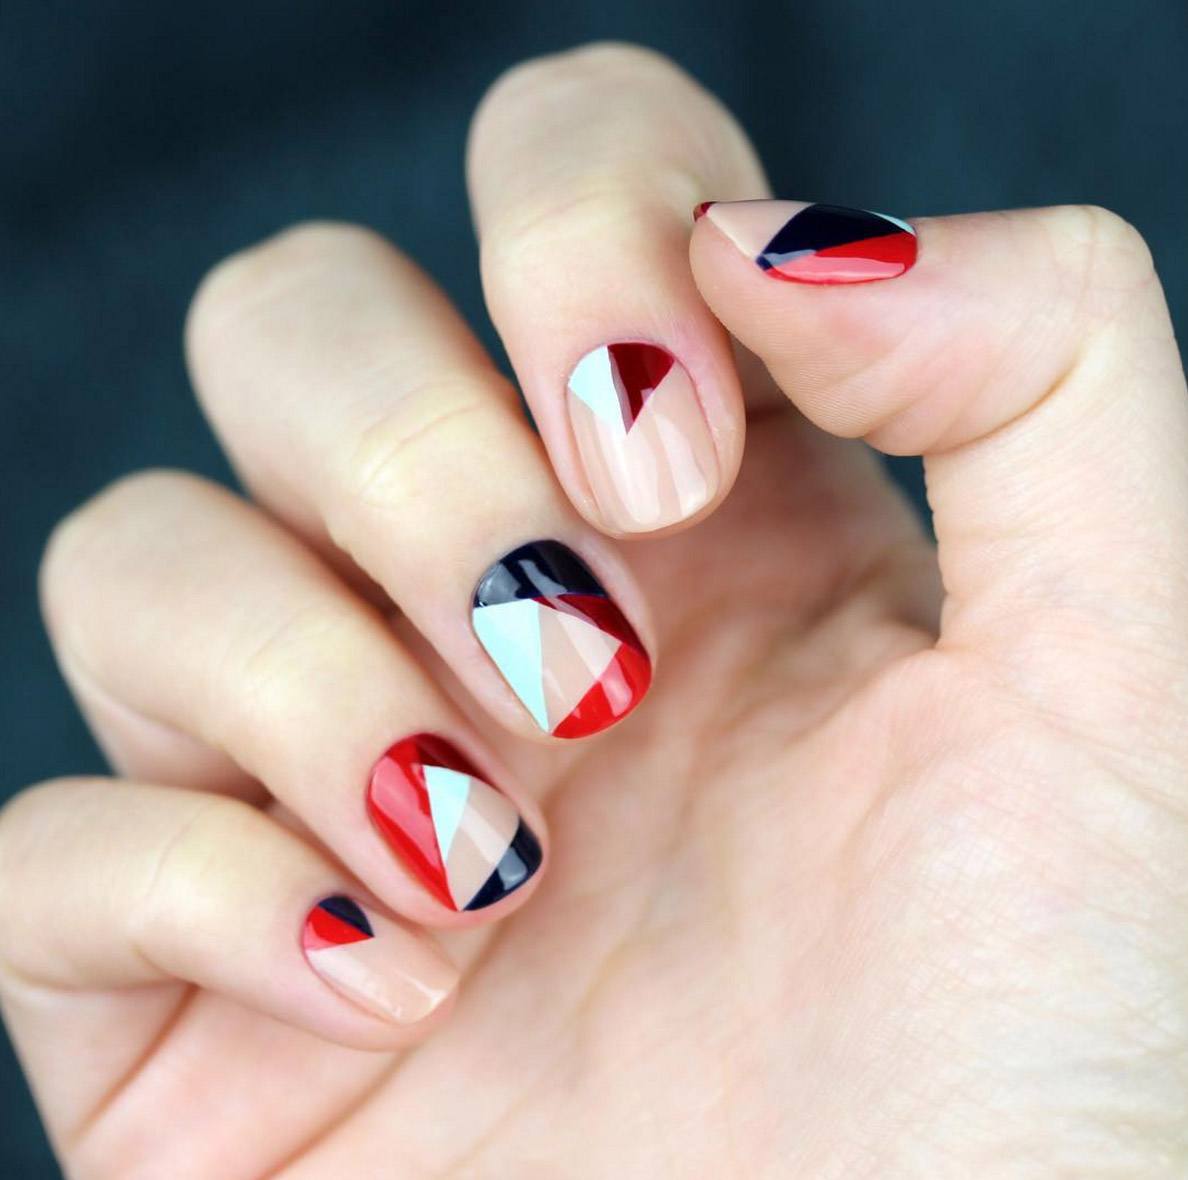
So if business meetings and other work moments prevail in your life, choose a pastel palette. For a holiday and vacation, juicy shades that increase the mood will fit.

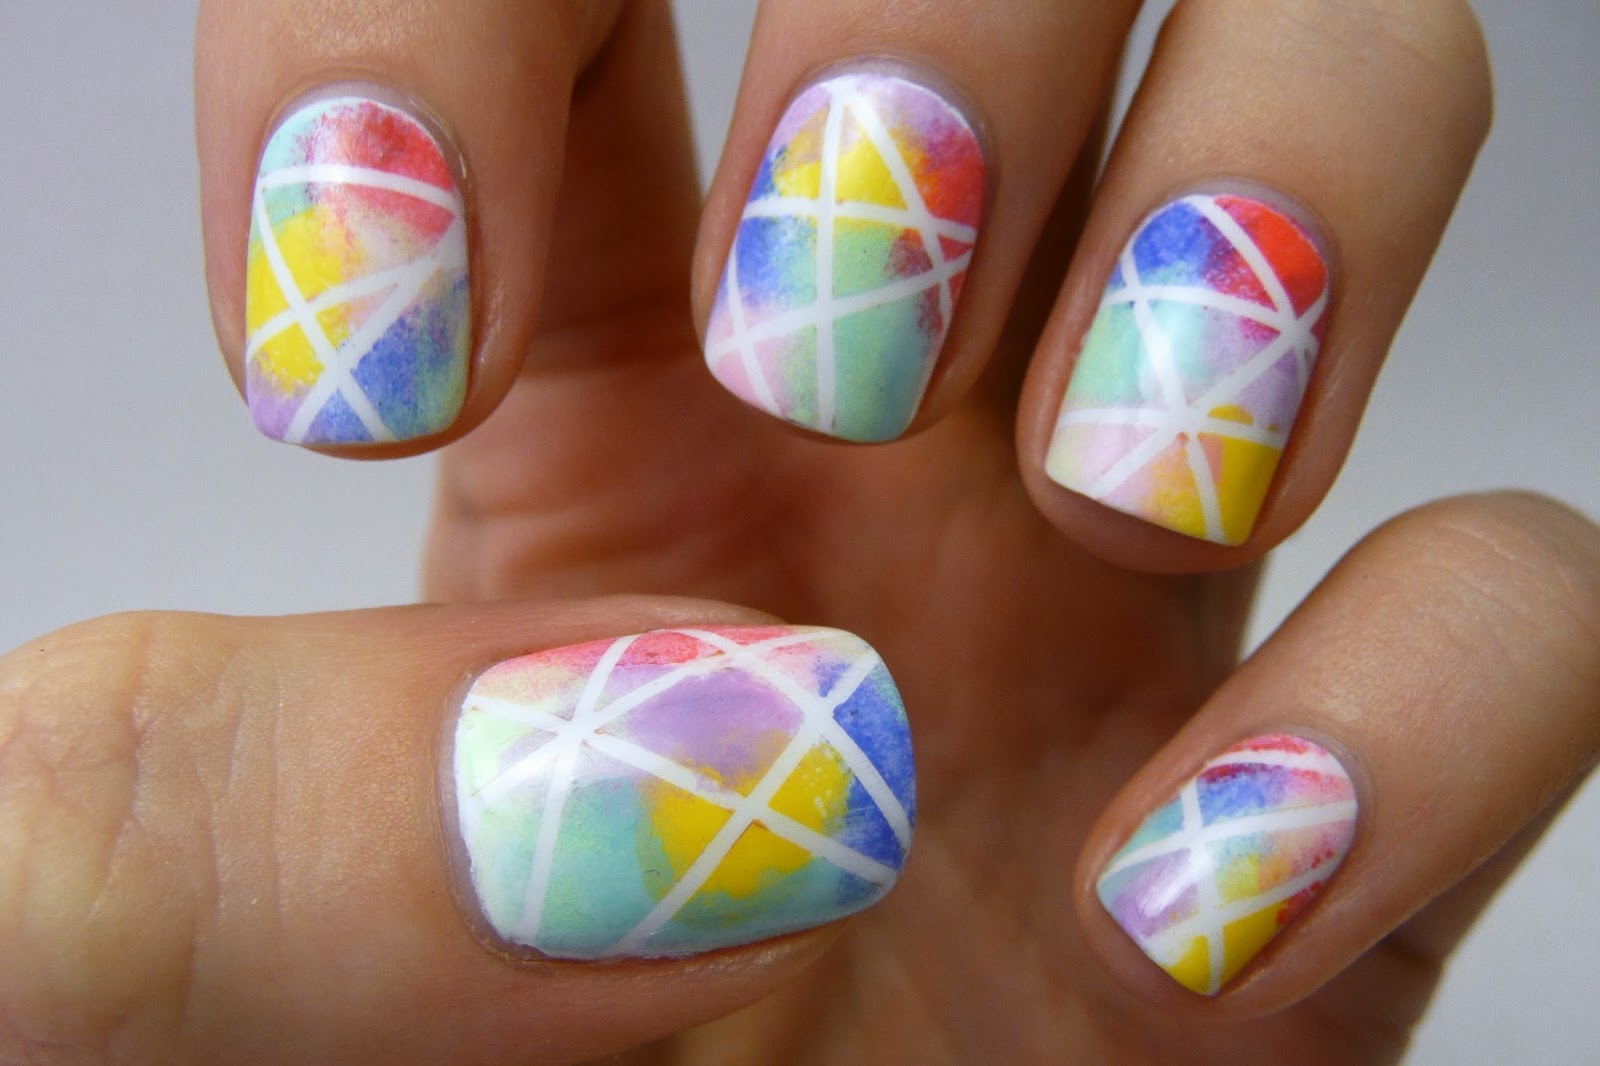
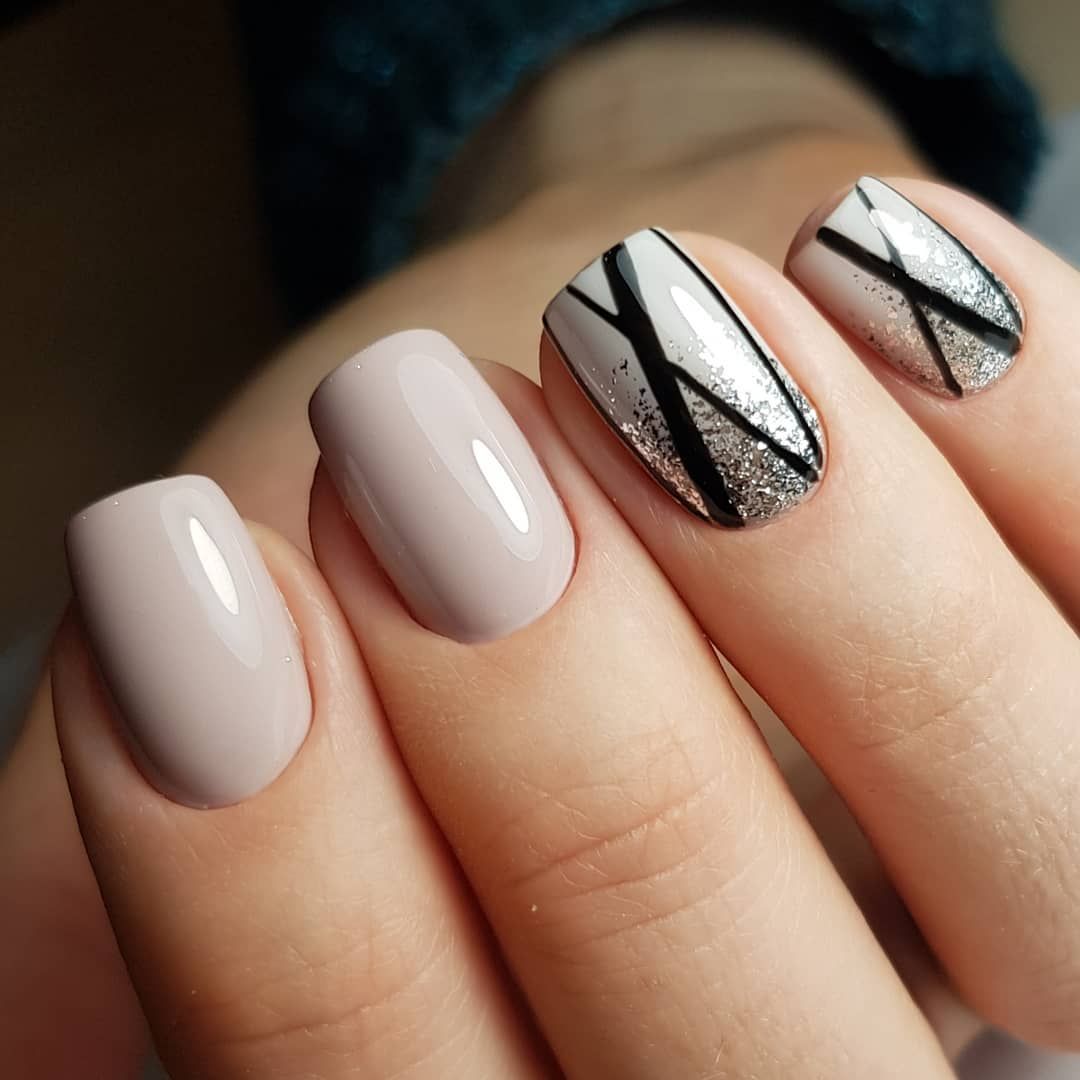
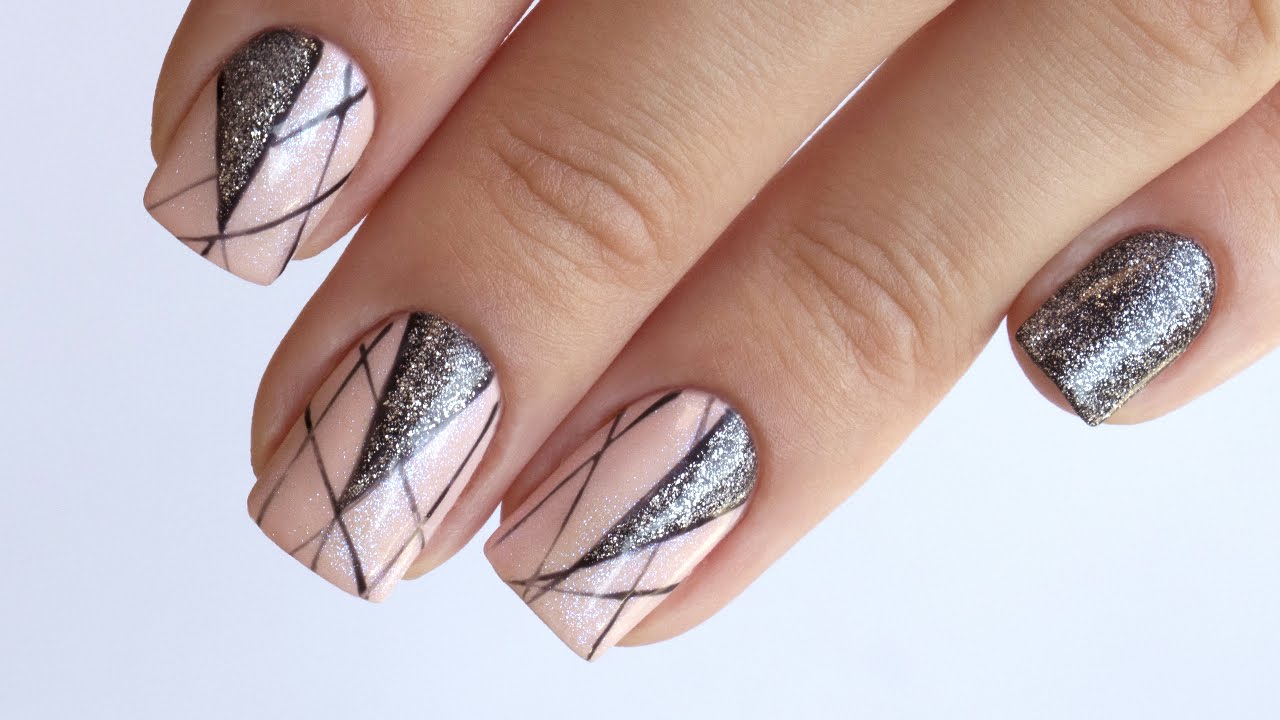
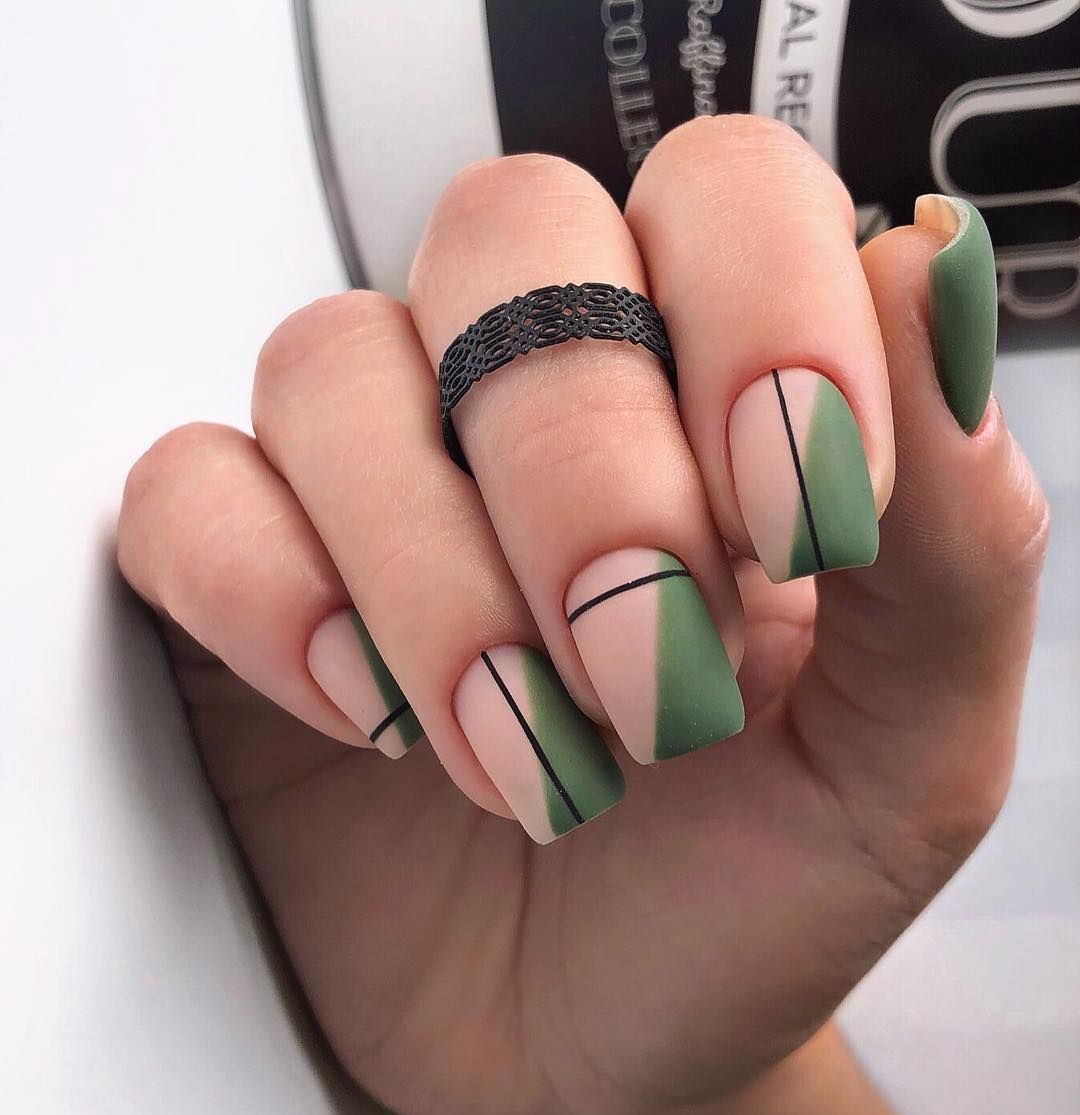
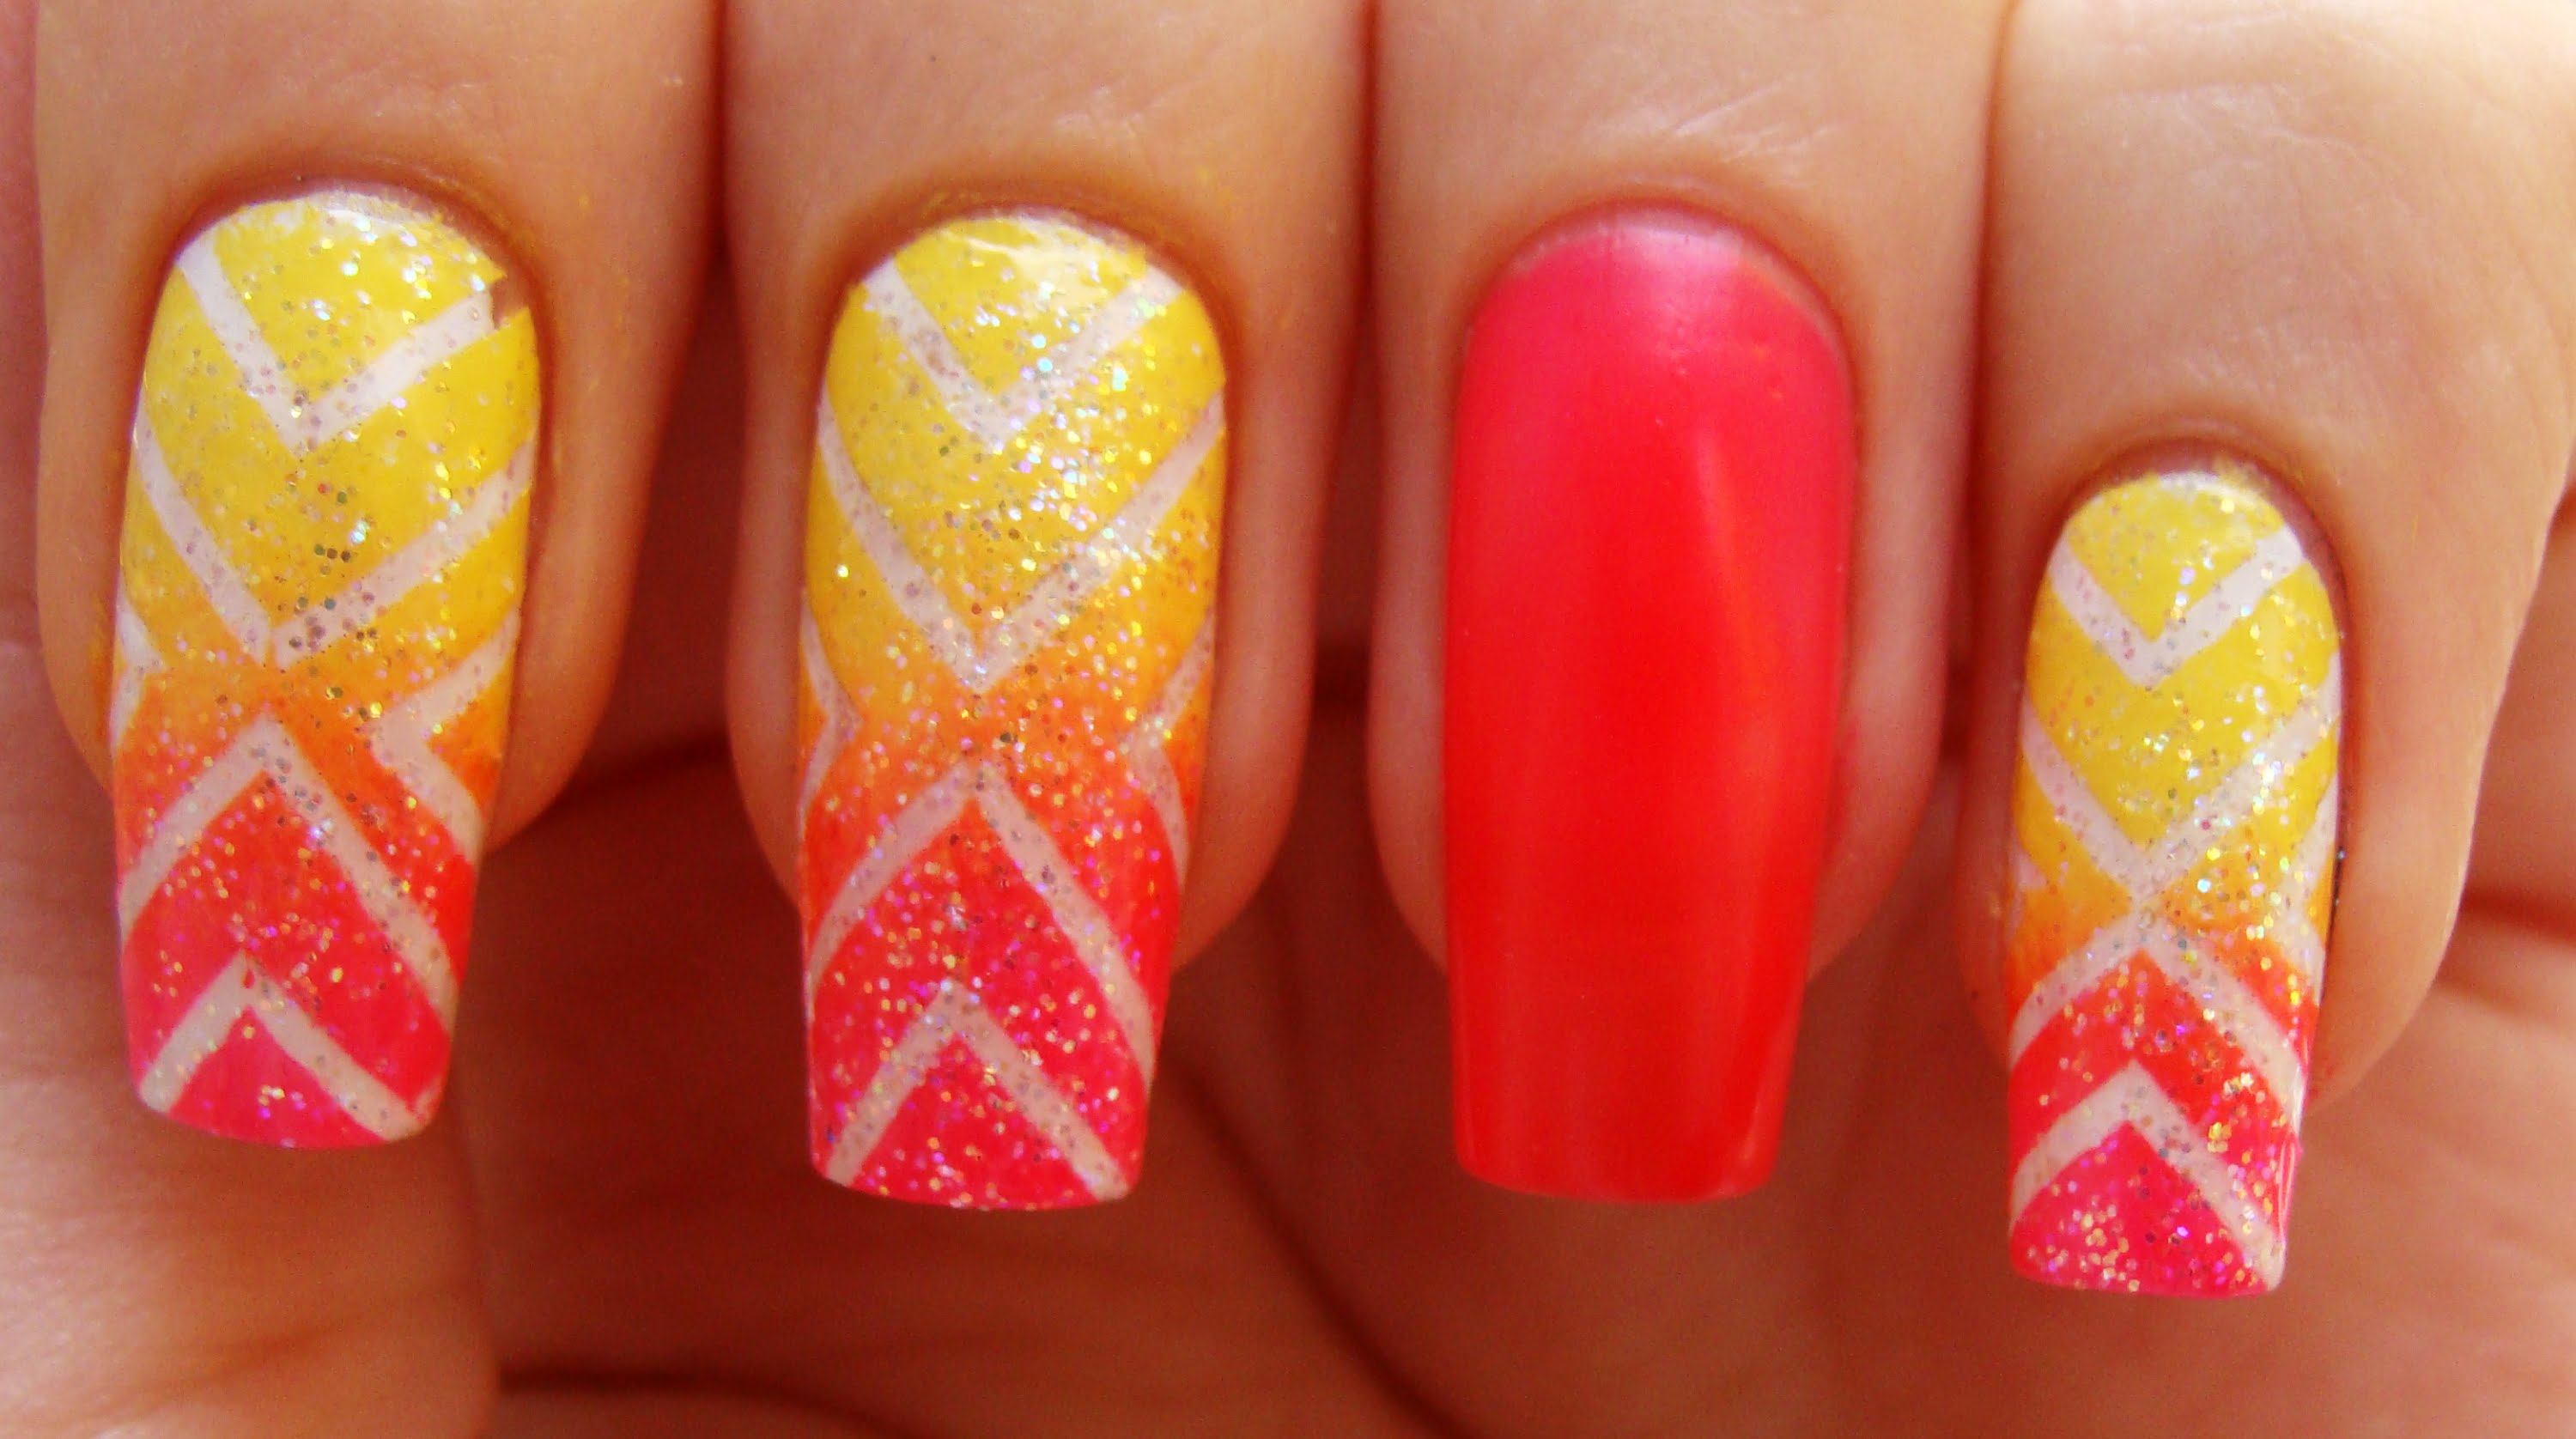
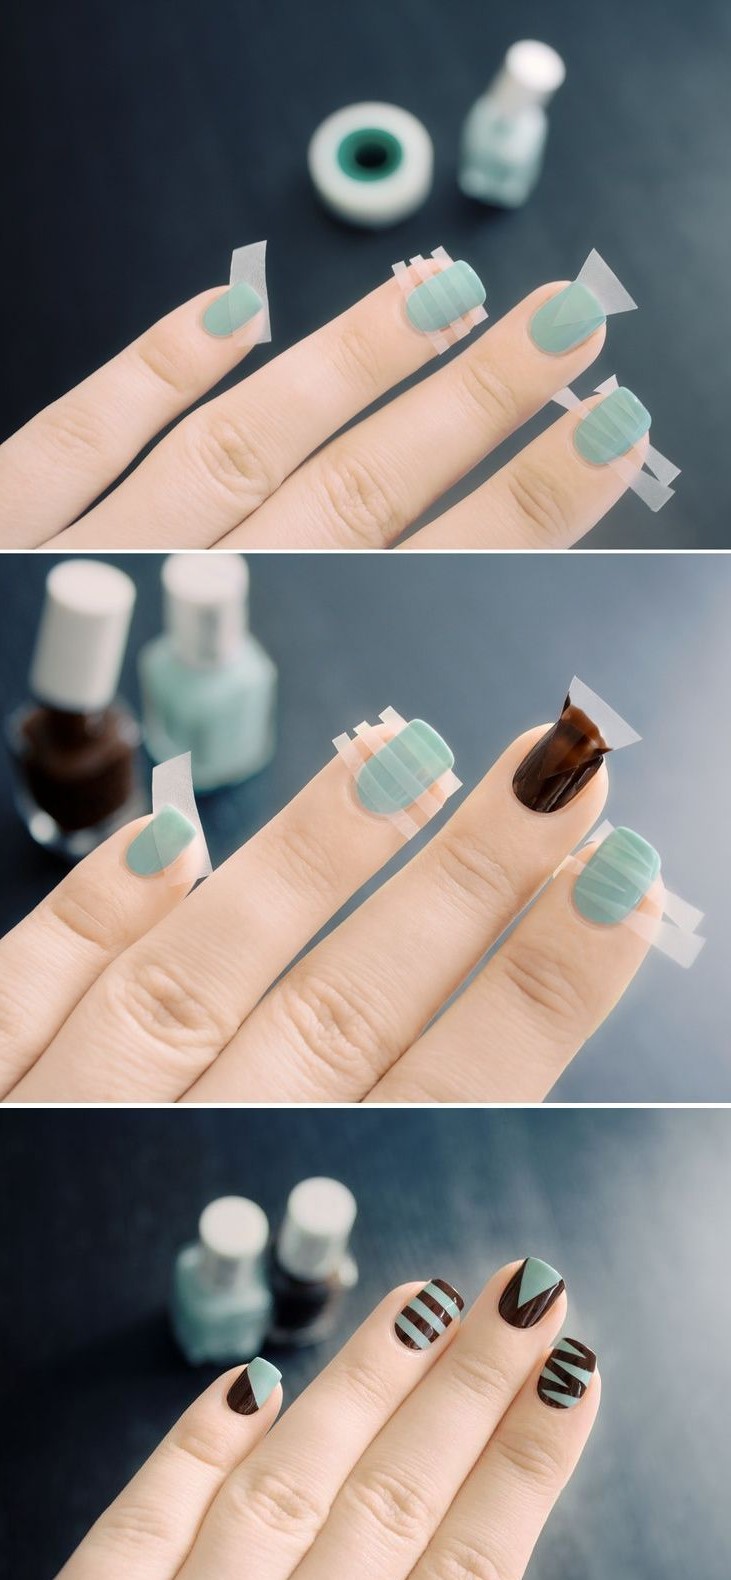
Diagonals
This wonderful variation also won over its admirers. For a smart and festive look, cover your nail with colorful rainbow stripes. Do not be afraid if the joints are sloppy, later all the irregularities will disappear under a dark layer.
Now glue several pieces of tape diagonally or parallel, perpendicularly - in general, as you wish. Cover the plate with a dark color. After removing the stickers, beautiful rainbow rays will remain in their place.
Intriguing puzzles
Everyone knows what this fun for the mind looks like.
For such a manicure you will need:
- cut out a stencil in the form of a mosaic piece from a wide ribbon;
- paint your nails with white varnish;
- glue two puzzles perpendicularly;
- paint over the part where the sticker is missing;
- as soon as everything is dry, remove the glued puzzle. The spectacular design is ready.
You can slightly modify the task. Cut out small squares, and after the enamel has dried and the tape removed, paint the circles in certain places.
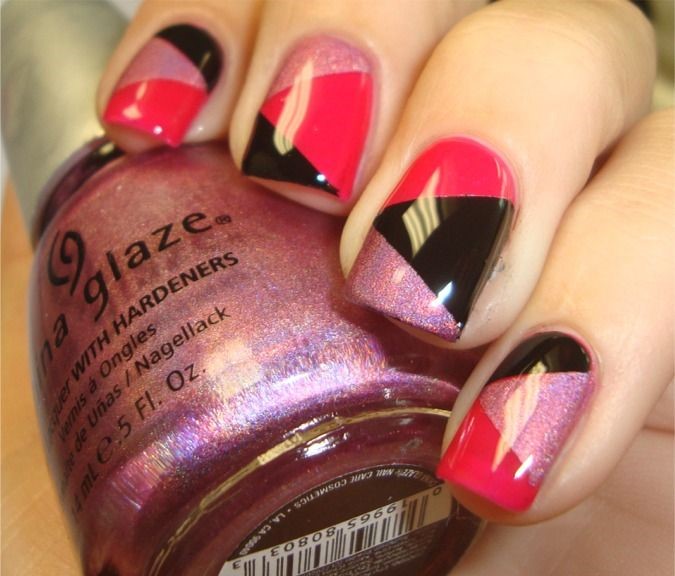
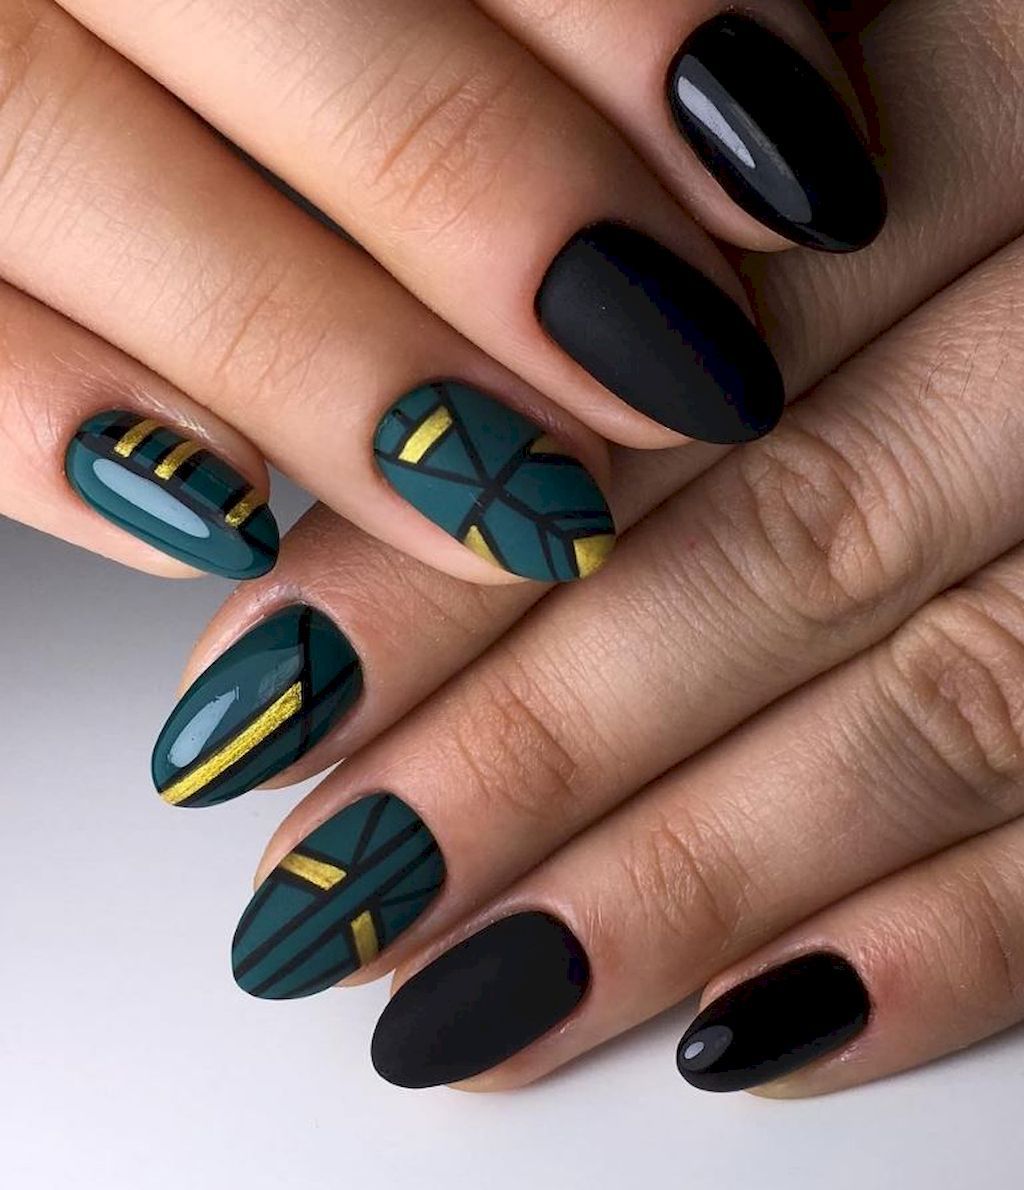
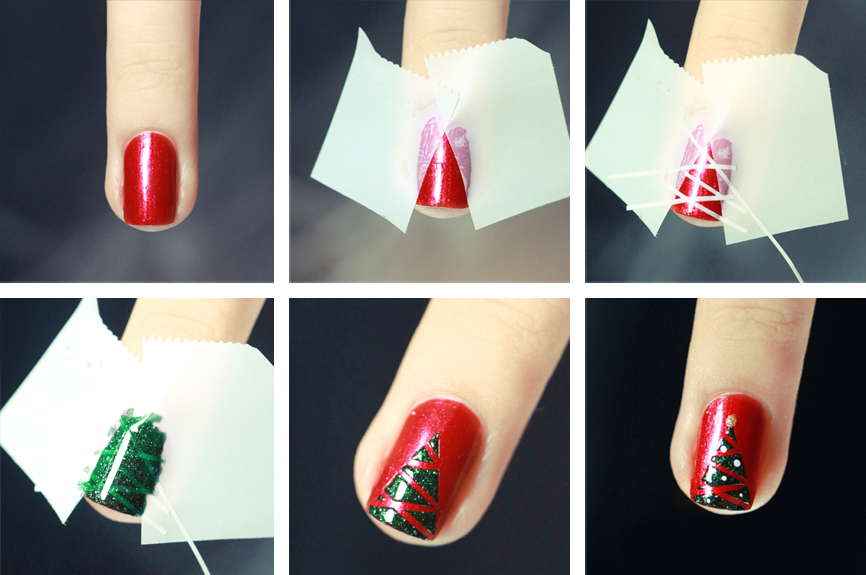
Leaf veins
A spectacular creation, quite suitable for an evening look. For the background, choose an emerald green shade with glitter.
Then overlay pieces of scotch tape, imitating the veins of the leaf, like rays coming out of one point. Cover the plate with black, remove the tapes.
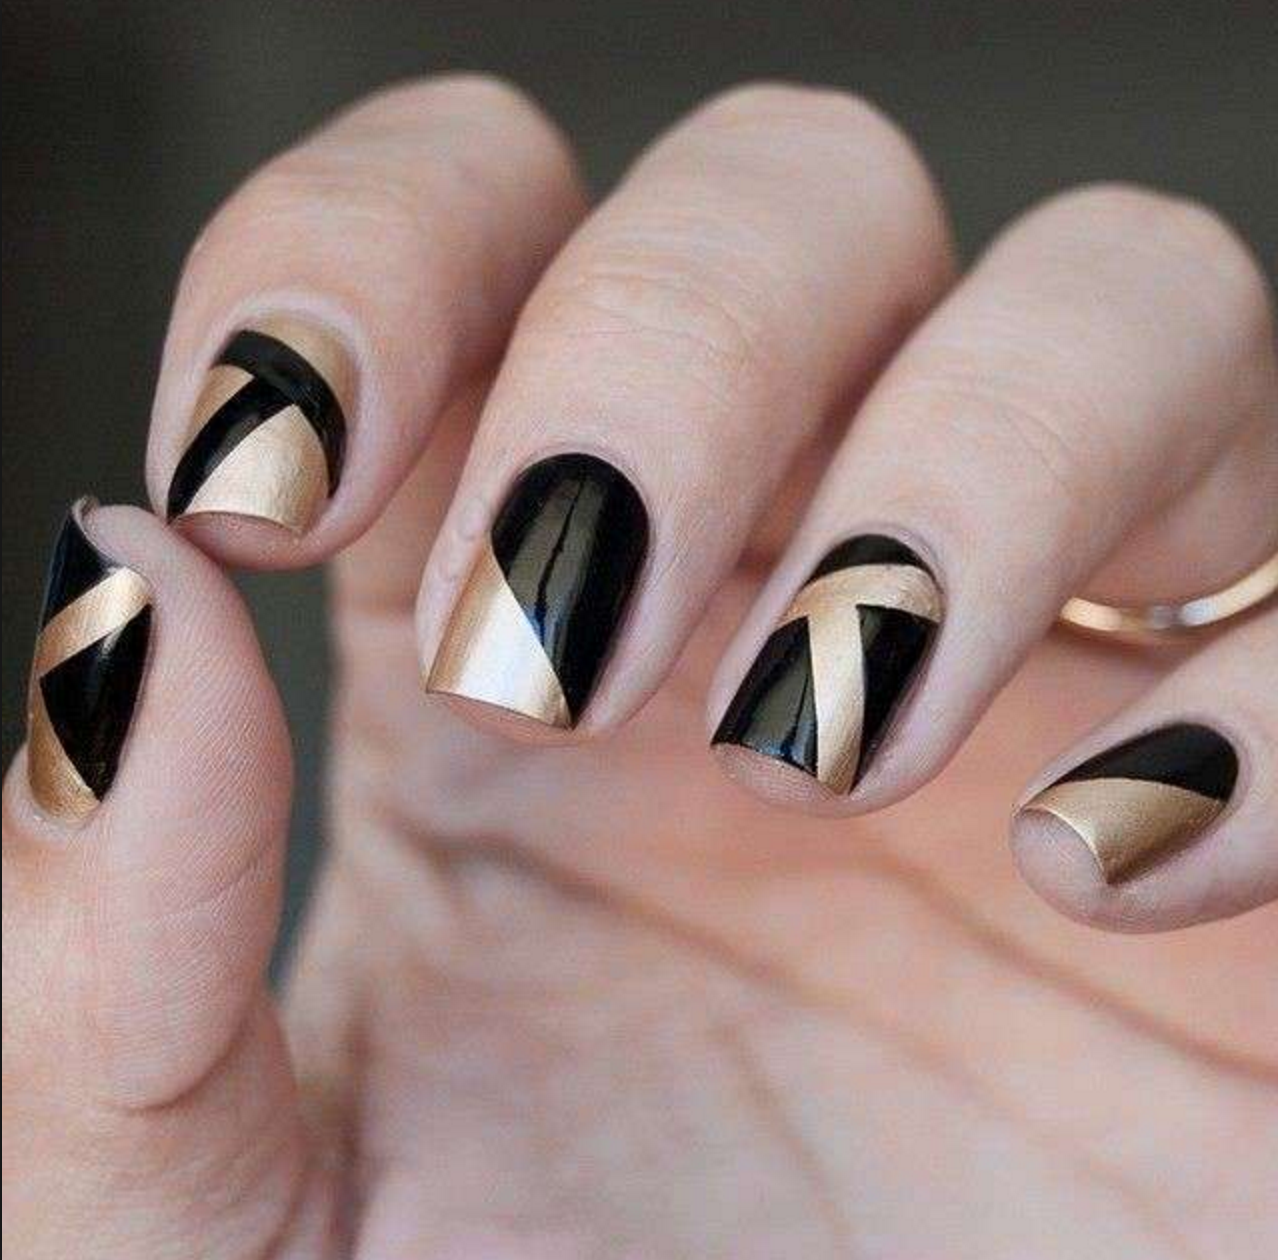
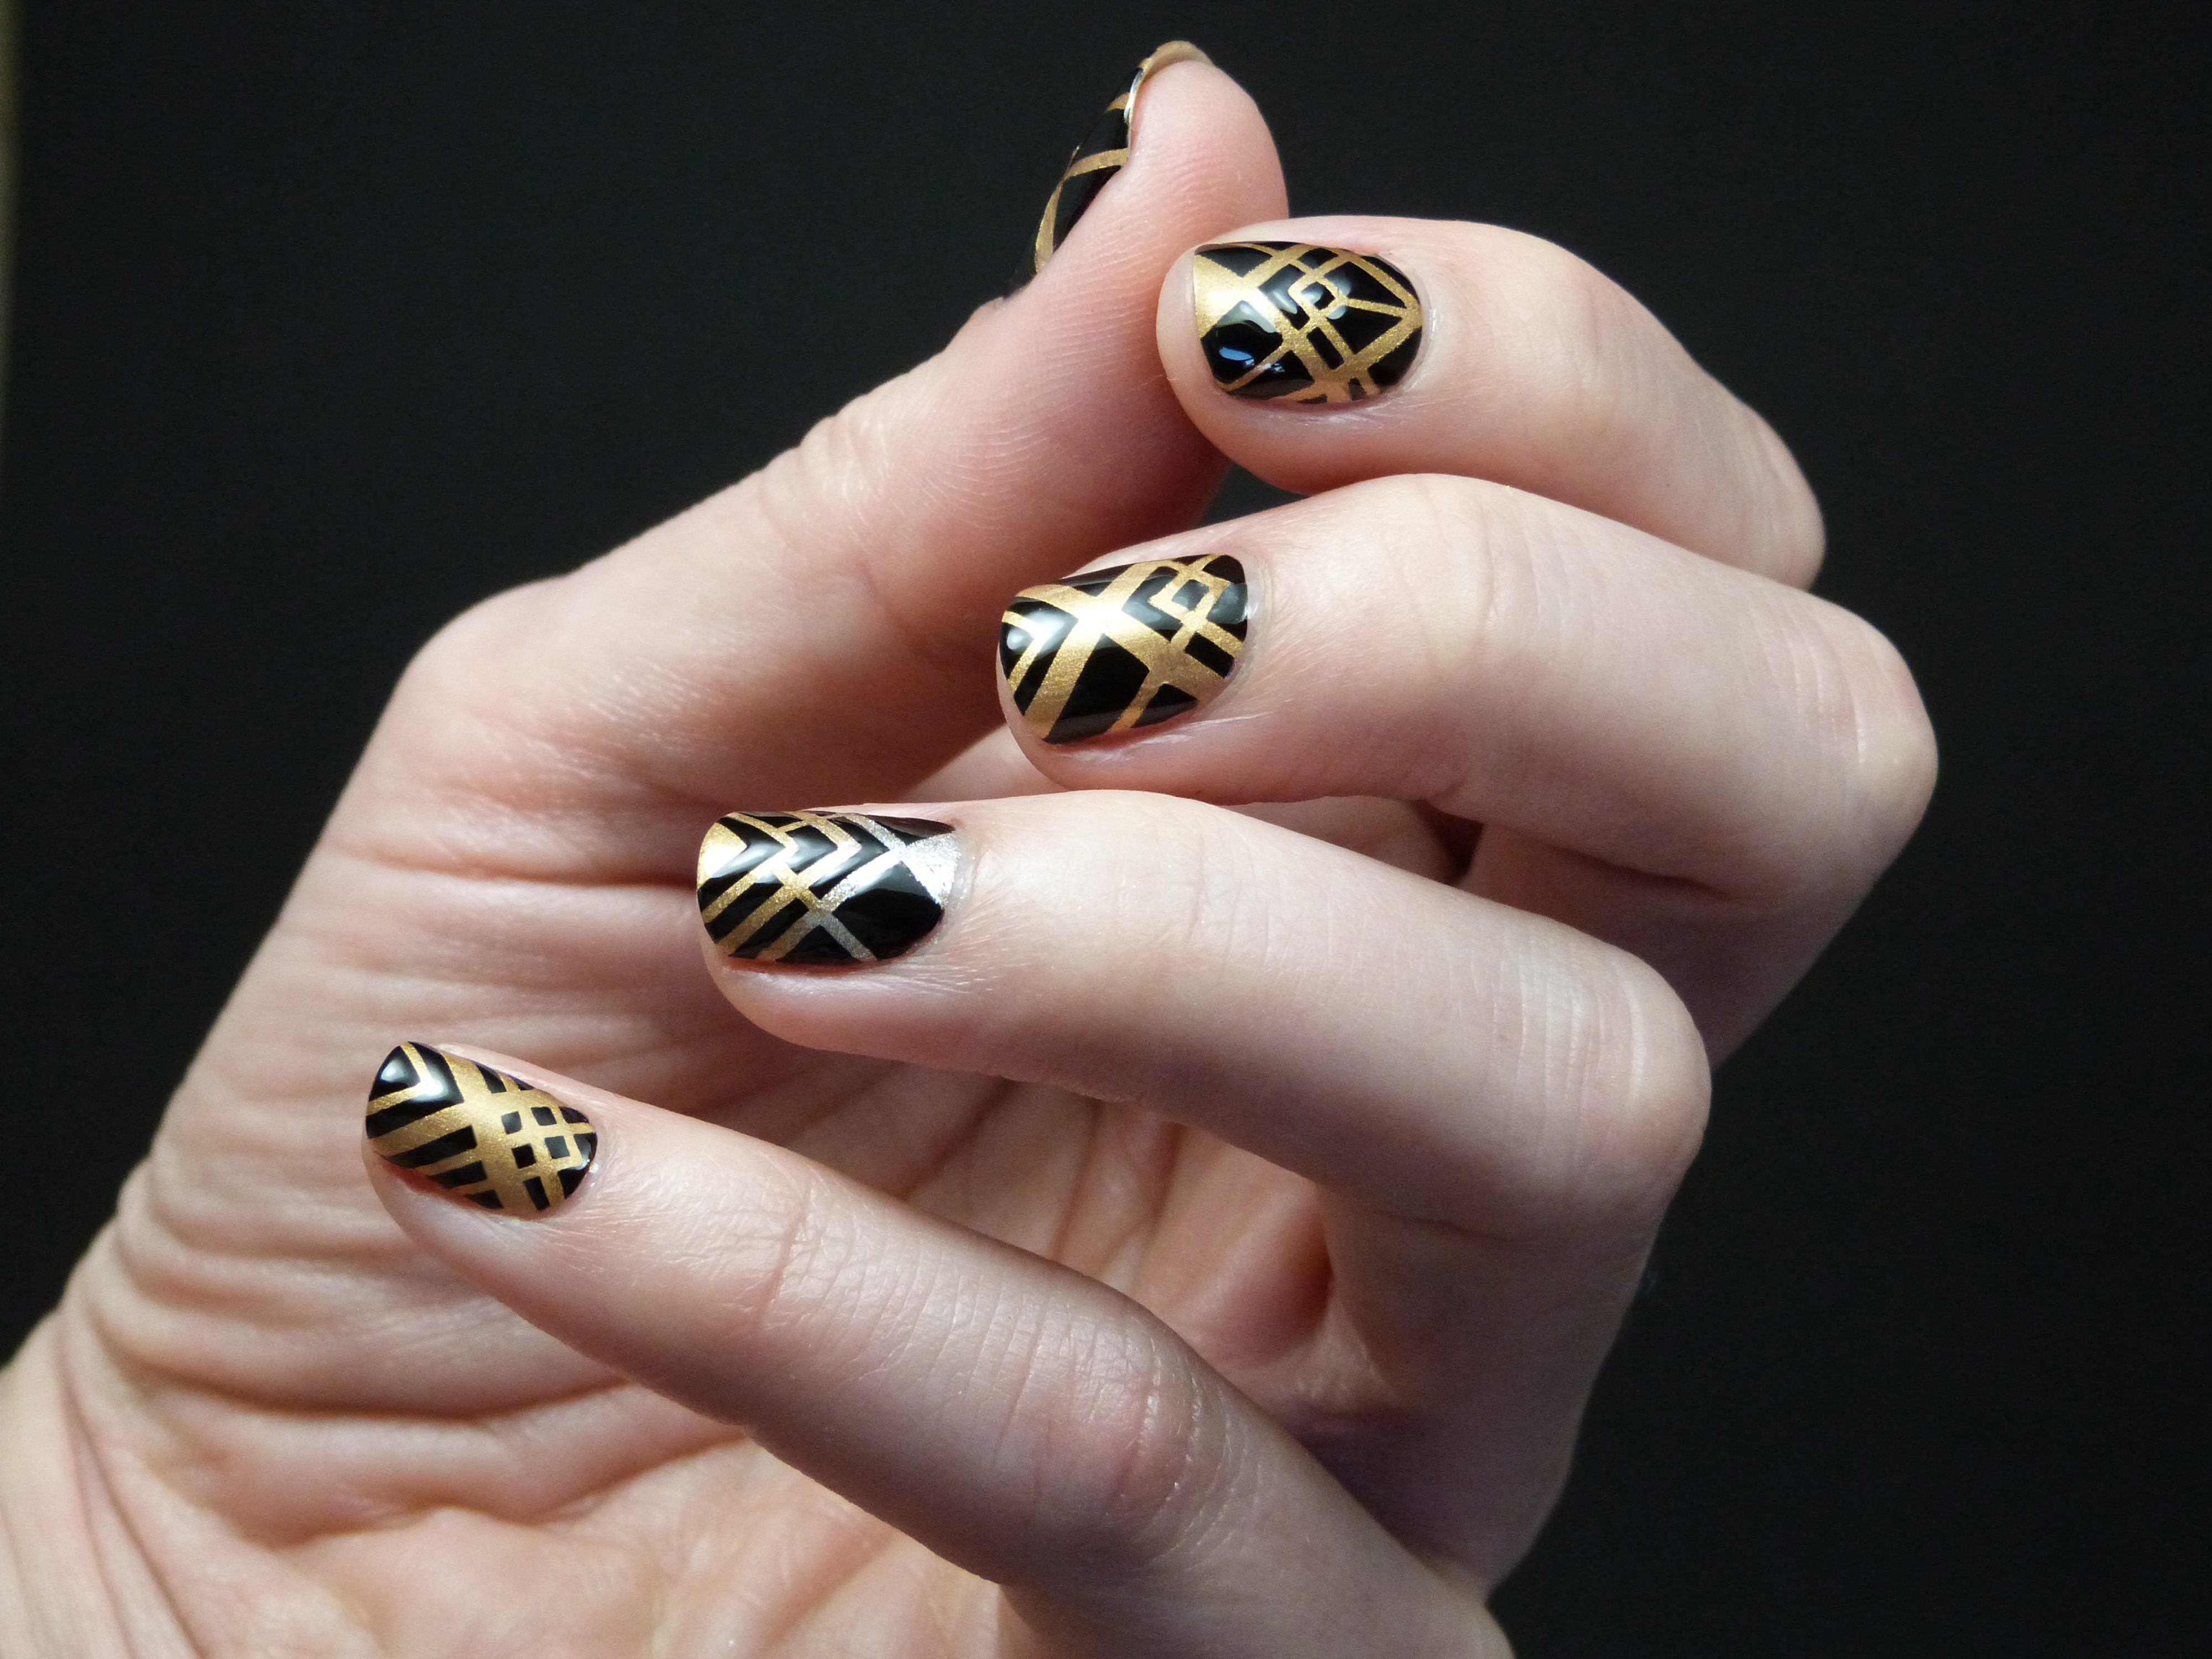
Gold chess
The original design will definitely not go unnoticed with the correct selection of shades.
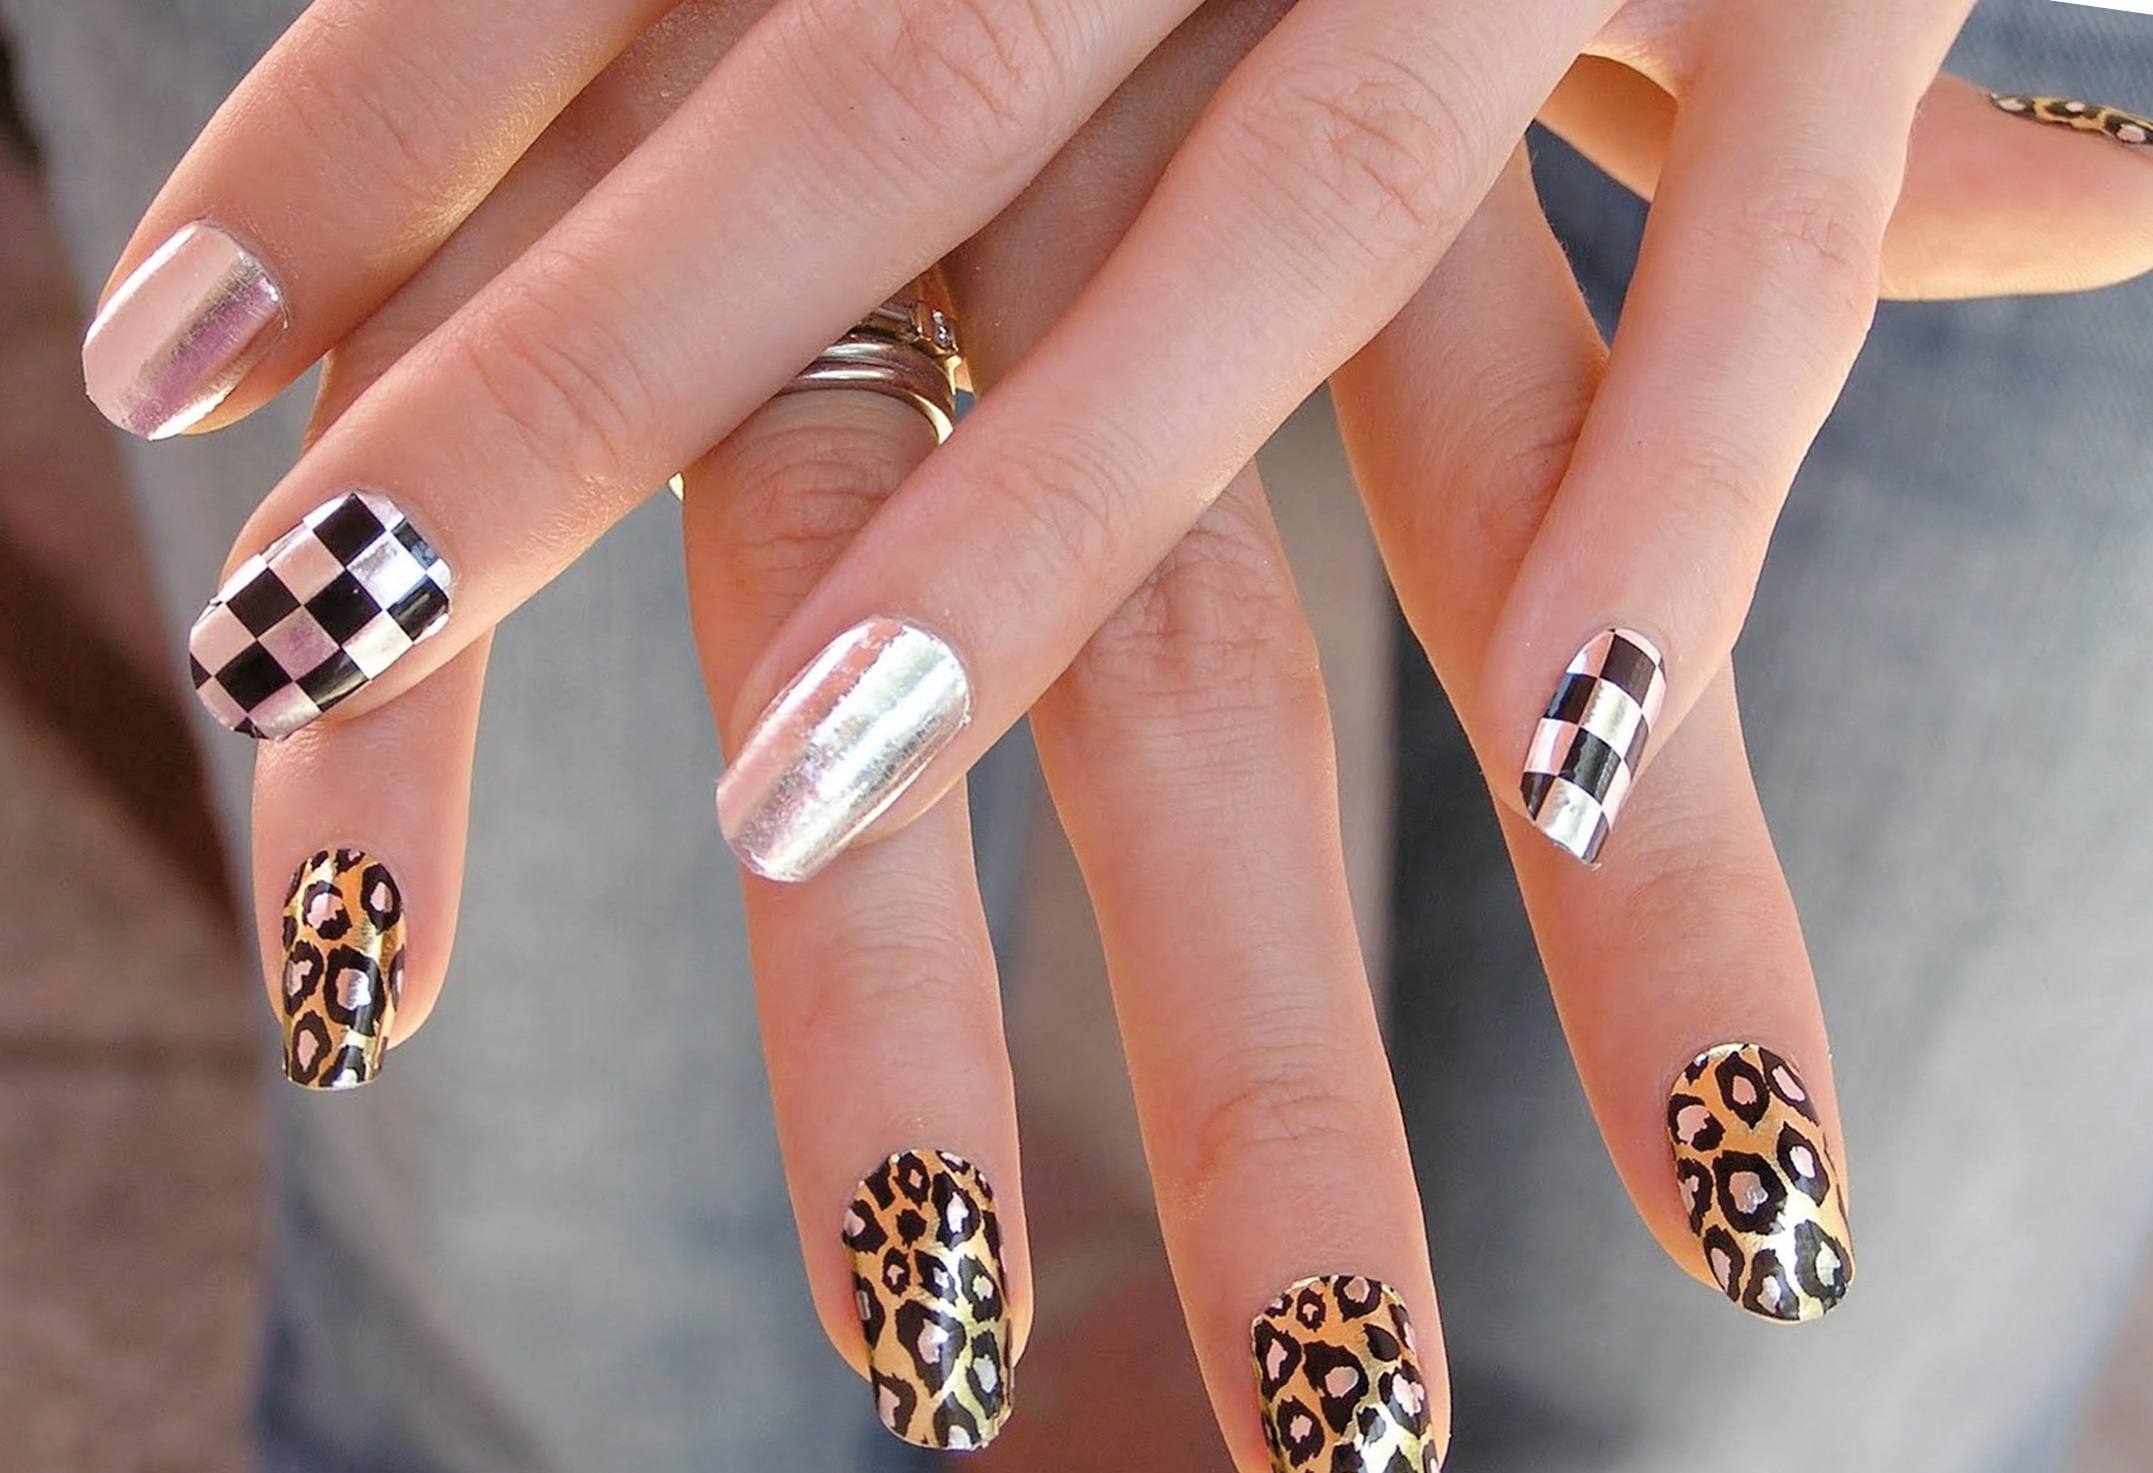
Created in a few steps:
- the surface of the nail is covered with a transparent base, and then in a black tone;
- then select a quarter of the plate in the form of a square with electrical tape, paint over the free part in gold;
- remove the tape, then paste over the second square, located diagonally from the previously painted figure;
- also paint over the unpapered place with golden color;
- cover the work with a top.
Water design
Everyone knows what beauty can be obtained with the technique of water nail art. In this version, different shades of enamels are alternately dripped into a container with water, then ornate stains are created with a toothpick or a thin stick.
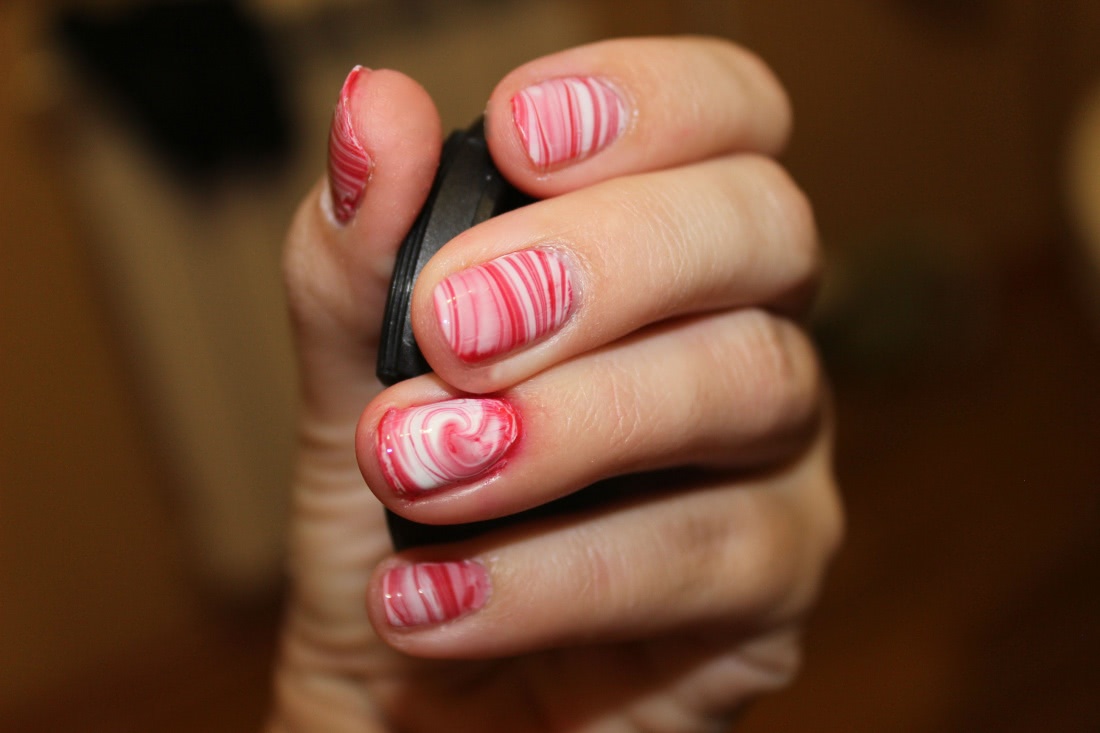
After that, it remains to wet the nail in a glass and clean the finger of stains. However, this is not so easy to do. Insulating tape will help here, it can be used to paste over the skin around the nail so that nothing superfluous gets on it. Simply removing the sticky is much easier than wiping your finger with acetone.
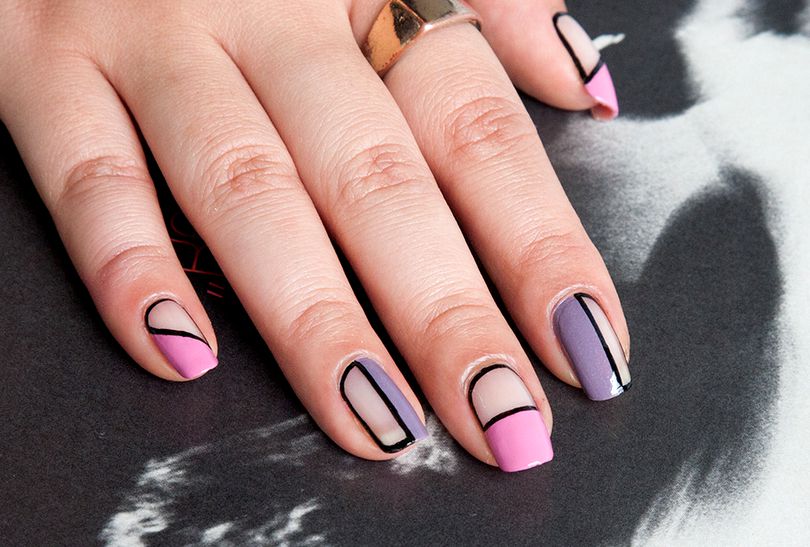
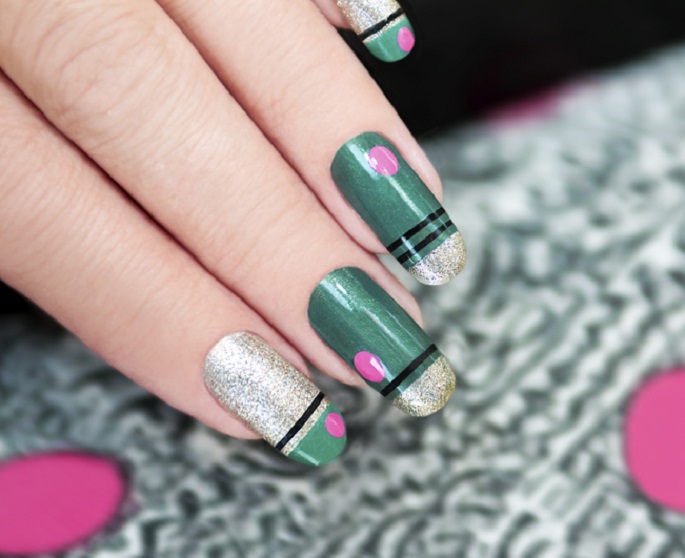
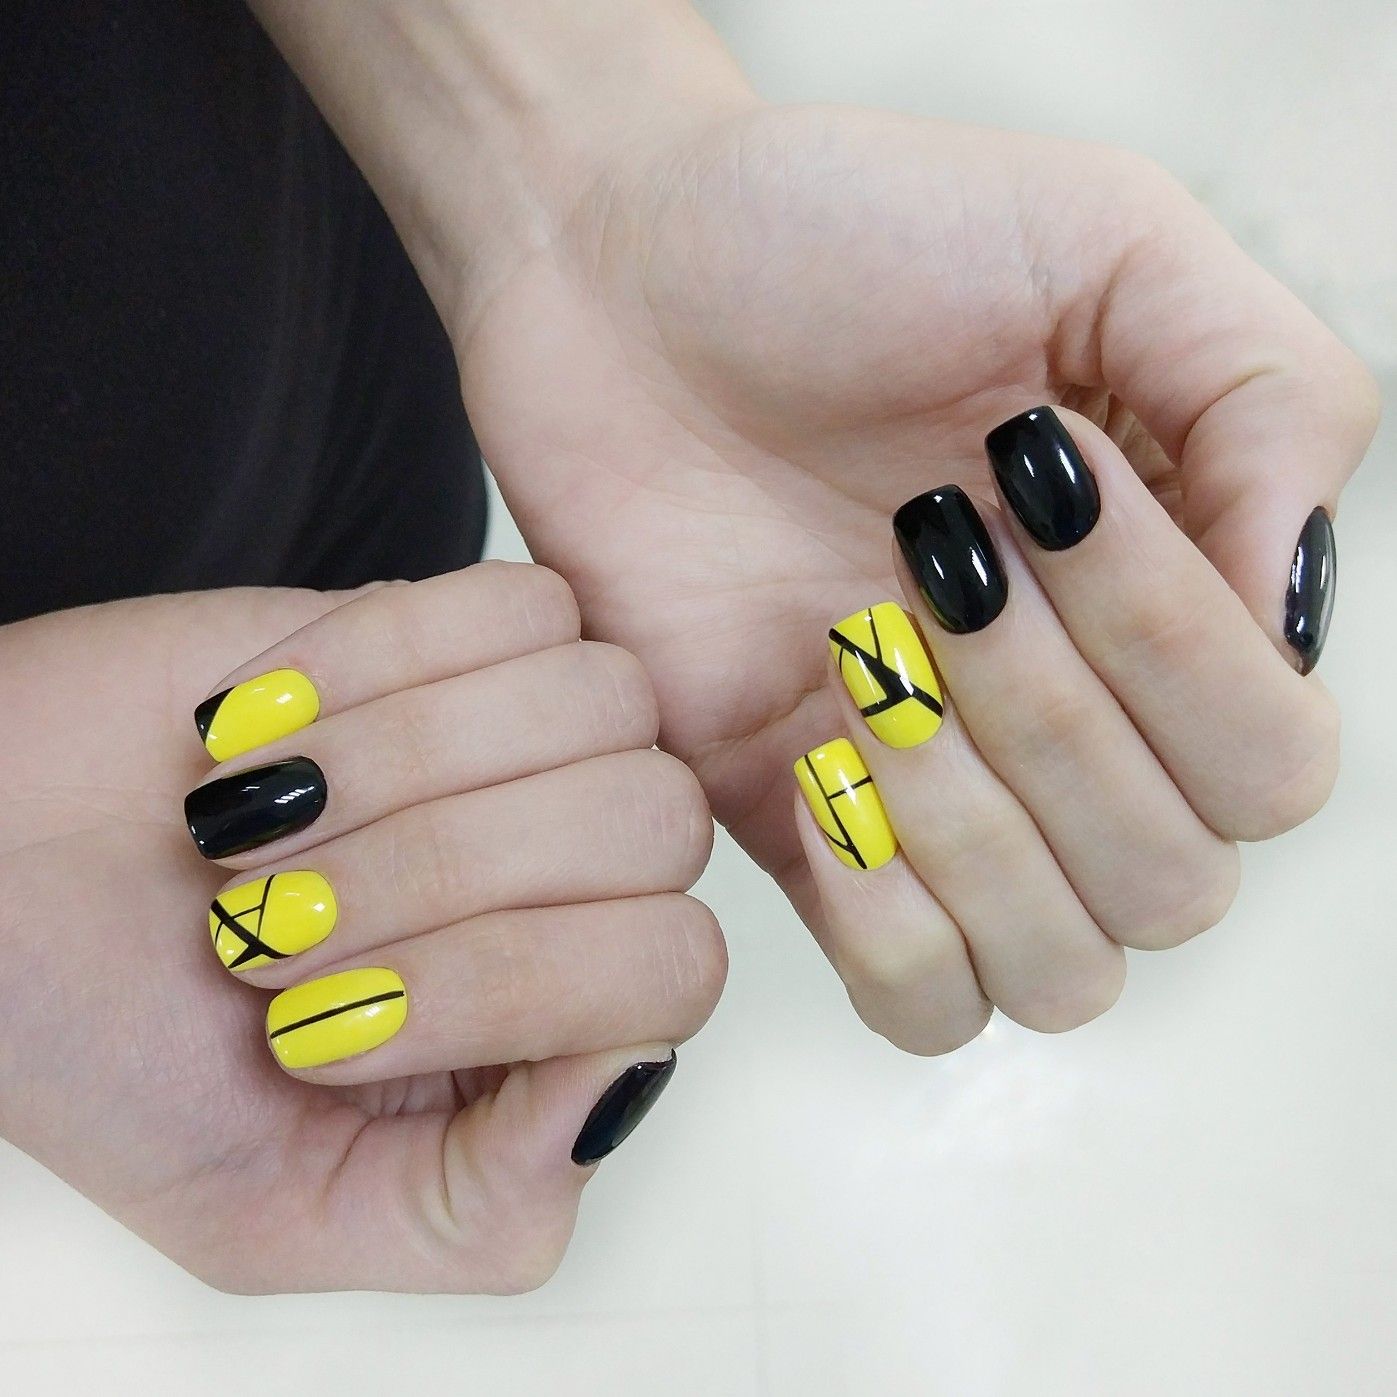
Scotch tape as an independent decorative element
Here the situation is even simpler. It is enough to cut out interesting shapes and stick them after the background has dried. It remains to cover the work with the top.
 With colored adhesive tape, you can lay out certain stripes, patterns or ornaments, and also fix the result with a transparent coating.
How to decorate
A seemingly ready-made design can always be supplemented with an interesting decor.
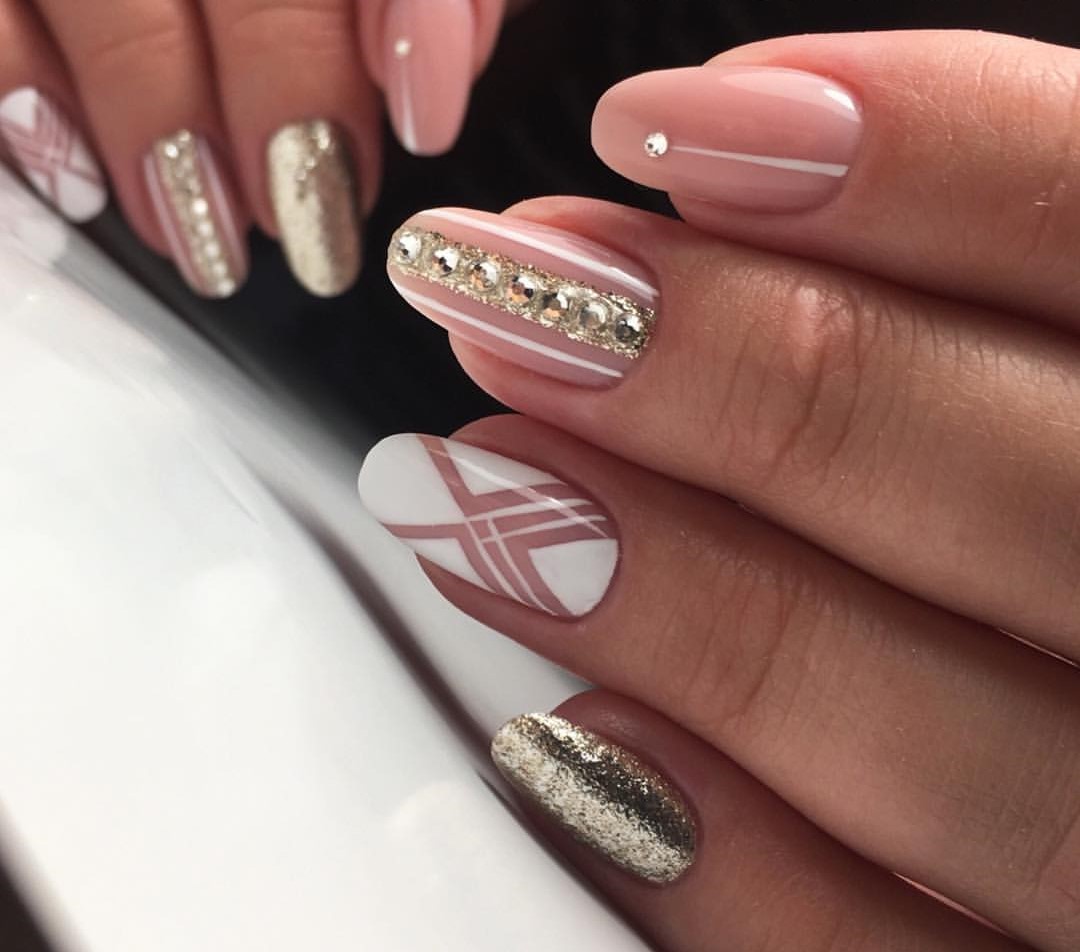
Today masters of the nail industry prefer to work with the following types of decorative elements:
- pebbles and rhinestones;
- broths;
- beads and pearls;
- kamifubiki;
- sparkles.
It is not necessary to decorate all 10 nails, it is enough to place a catchy composition on two or three fingers.
Life hacks for you
Finally, we will reveal a few secrets of how to facilitate the process of creating a nail design.
- Removing the old coating. So that after erasing a rich red or other color, your hands do not look like you splashed in colored ink, lubricate your skin with a greasy cream before the procedure.
- A piece of sticky tape can be used to remove excess enamel from the skin if the previous method fails.
- We whiten the marigolds. Sometimes a catchy tone is absorbed into the nail plate, leaving behind ugly stains. To clean, brush your nails with a toothbrush and whitening toothpaste.
- We create the desired shade ourselves. This recommendation will help girls who cannot find the desired tone in the store. Add some mineral eyeshadow to the clearcoat. They dissolve perfectly in this substance, and you can personally adjust the saturation.
- Better three thin, but neat layers of coating than one gnarled. Remember, it is impossible to paint a surface with high quality at a time.
- Masking the irregularities of the jacket. You can hide flaws with sparkles. Sprinkle them over the edge of the uneven smile before the finish has time to dry. It will turn out festive and beautiful.
- If the varnish has dried up, professionals advise to put the bottle in the refrigerator for 10-15 minutes, and then shake well.
And some more cute designs in the next video.
And some more ideas for you